Amber: That Captivates the World 2025

AmberA1
AmberA2

Amber: The Fossilized Resin That Captivates the World 2025

Amber, a fossilized tree resin, has fascinated humans for centuries due to its unique characteristics, historical significance, and scientific value. From being a prized gemstone to offering a glimpse into prehistoric ecosystems, amber continues to capture the imagination of scientists, collectors, and enthusiasts alike.

What Is Amber?

Amber is not a mineral but an organic compound formed from tree resin that has undergone fossilization over millions of years. This natural process transforms the resin into a durable, lightweight, and often translucent material with hues ranging from golden yellow to deep red and even green or blue.

Composition of Amber

Amber is primarily composed of carbon, hydrogen, and oxygen, with trace amounts of sulfur and other elements. Below is a detailed table outlining its typical chemical composition:

ElementPercentage Range
Carbon67–80%
Hydrogen7–11%
Oxygen8–12%
Sulfur0.1–3%

Amber’s chemical stability and organic origin make it a unique substance among natural materials. The presence of succinic acid in some amber types contributes to its physical and medicinal properties.

Types of Amber

Amber can be classified based on its origin, color, and inclusion types:

  1. Baltic Amber: Found in the Baltic region, it is renowned for its clarity and inclusions, often containing prehistoric organisms.
  2. Dominican Amber: Known for its remarkable transparency, it frequently contains well-preserved inclusions such as insects and plant fragments.
  3. Copal: A younger, semi-fossilized resin often mistaken for true amber, primarily found in tropical regions.
  4. Blue Amber: Rare and unique for its mesmerizing blue fluorescence under sunlight, predominantly found in the Dominican Republic.

Formation and Geographical Distribution

Amber forms from the resin exuded by certain types of trees, primarily conifers, as a defense mechanism against pests and diseases. Over millions of years, the resin is buried under sediment, where heat and pressure initiate the polymerization process, eventually fossilizing it into amber.

Major Amber Deposits

Amber deposits vary in age and composition, depending on their geological origins. Below is a table summarizing the major deposits worldwide:

RegionType of AmberGeological Age (Million Years)
Baltic RegionBaltic Amber44–45
Dominican RepublicDominican Amber15–20
MyanmarBurmite99
MexicoChiapas Amber22–26
ChinaFushun Amber50–60

These regions continue to supply amber for scientific research, jewelry, and decorative arts, contributing to the global appreciation of this natural marvel.

Historical and Cultural Significance

Amber has held a place of prestige throughout human history. Ancient civilizations valued it for its beauty and purported magical properties. In Ancient Rome, amber was more valuable than gold, while in Chinese culture, it was associated with the “soul of the tiger.”

Amber in Art and Jewelry

The use of amber in art and jewelry dates back thousands of years. The most famous example is the Amber Room, a chamber decorated with amber panels and gold leaf, considered the “Eighth Wonder of the World.” Created in the 18th century, the Amber Room was looted during World War II and has since become one of history’s great mysteries. Replicas and recovered pieces continue to inspire awe in visitors to museums and exhibitions worldwide.

Medicinal Uses

In traditional medicine, amber was believed to possess healing properties, including alleviating pain, reducing inflammation, and promoting overall well-being. Modern studies have identified succinic acid, a compound present in amber, as having potential anti-inflammatory and therapeutic benefits. Amber necklaces and bracelets are still popular today, especially for teething babies and holistic therapies.

Religious and Spiritual Importance

In addition to its artistic and medicinal uses, amber held spiritual significance in many cultures. It was often used in religious ceremonies, as talismans, and in burial rites to signify protection and immortality. Amber beads were prized components of prayer necklaces in Buddhist and Christian traditions.

Amber in Science

Amber’s ability to preserve ancient organisms offers invaluable insights into prehistoric life. Researchers have discovered insects, plants, and even small vertebrates perfectly encased in amber, providing direct evidence of life forms from millions of years ago. These inclusions act as “time capsules,” preserving not only the organism but also the conditions of its environment.

Notable Amber Fossils

One of the most remarkable discoveries includes a 99-million-year-old dinosaur tail, complete with feathers, encased in Burmese amber. Other notable finds include:

  • Ancient flowers and pollens that reveal early plant evolution.
  • Spiders and insects exhibiting behaviors frozen in time, such as hunting or mating.
  • Protozoa and microscopic organisms that provide data on microbial ecosystems.

These discoveries have significantly advanced our understanding of evolution, climate change, and the interconnectedness of ancient ecosystems.

Economic Value of Amber

The amber industry plays a significant role in the economy of regions where it is abundant. Below is a breakdown of its economic contributions:

ApplicationEstimated Market Share (%)
Jewelry and Accessories70%
Scientific Research15%
Decorative Items10%
Medicinal Uses5%

The global amber market continues to thrive, with increasing demand for both natural amber and amber-containing products. The rise of counterfeit amber, however, poses challenges to maintaining market integrity.

Amber Mining and Trade

Baltic countries and the Dominican Republic dominate the amber trade, with China emerging as a major market for both raw and finished amber products. Ethical sourcing and sustainable mining practices are gaining attention as the demand for this natural resource grows.

Challenges and Conservation

Despite its allure, amber faces challenges such as overextraction, counterfeiting, and environmental degradation. Conservation efforts aim to regulate amber mining and ensure sustainable practices to preserve this natural resource for future generations.

Counterfeit Amber

The rise of counterfeit amber, often made from plastics or glass, threatens the authenticity of the amber market. Common identification techniques include:

  • Float Test: Real amber floats in a saltwater solution.
  • Heat Test: Genuine amber emits a pine-like aroma when heated.
  • UV Light: Authentic amber fluoresces under ultraviolet light.
  • Microscopic Analysis: Reveals internal structures unique to fossilized resin.

Conservation Strategies

Efforts to conserve amber include:

  • Promoting awareness of sustainable mining practices.
  • Establishing certifications for authentic amber products.
  • Enhancing recycling and reuse of amber in artistic and industrial applications.
AmberA3
AmberA4

Conclusion

Amber’s journey from tree resin to a coveted material is a testament to nature’s transformative power. Its significance spans cultural, scientific, and economic domains, making it a timeless treasure. Whether admired for its beauty, studied for its scientific value, or used in therapeutic practices, amber remains a bridge connecting us to the ancient past. Its continued exploration and preservation promise to unveil even more of Earth’s secrets in the years to come.

References

  1. Grimaldi, D., & Engel, M. S. (2005). Evolution of the Insects. Cambridge University Press.
  2. “Amber: Fossilized Resin,” Smithsonian Institution, www.si.edu.
  3. Poinar, G. O. (1992). Life in Amber. Stanford University Press.
  4. Ross, A. (2010). Amber: The Natural Time Capsule. Harvard University Press.
  5. “Amber Mining and Its Challenges,” Geological Society, www.geosociety.org.

Recommended Articles:

What Can I Feed a Stray Cat: 2025 Comprehensive Guide – love a happy home
What to Do if You Find a Stray Dog 2025 – love a happy home

What Color Is Amber 2025?

WhatColorIsAmberA2

What Color Is Amber 2025?

Amber is a unique and fascinating substance known for its warm, golden hues and its rich history. Derived from fossilized tree resin, amber has been cherished for millennia for its beauty and properties. However, its color is often misunderstood, as it can vary widely depending on its origin and composition. In this article, we delve into the science, history, and cultural significance of amber’s color, enriched with tabular data, authoritative insights, and reference links.


Understanding the Color Spectrum of Amber

Amber is most commonly associated with a golden-yellow hue, often resembling honey. However, amber’s color spectrum is much broader than many realize. It can range from pale yellow to deep brown, and even to less common shades like green, red, and blue. This variation makes amber a truly mesmerizing natural wonder.

Common Amber Colors and Their Descriptions:

ColorDescriptionOccurrence
YellowBright, sunny hue; most classic and recognizable.Very common
GoldenRich, honey-like tones; highly sought after.Common
BrownDeep, earthy shades; often more opaque.Common
RedRare, fiery hues caused by oxidization.Rare
GreenPale to vibrant shades; formed by unique inclusions.Rare
BlueExotic and luminous; results from rare fluorescence.Extremely rare

Amber’s variety of colors reflects not only its natural formation process but also its interaction with the environment. Each hue carries a story of ancient forests and unique geological conditions.


The Science Behind Amber’s Color

The color of amber is influenced by several factors:

  1. Chemical Composition: Trace elements and impurities within the resin can alter its color.
    • For instance, iron oxide gives amber a reddish hue.
  2. Oxidation and Aging: Over time, exposure to air can darken the amber. Newly discovered amber may have lighter colors that gradually deepen.
  3. Inclusions: Organic materials such as plant debris or insects embedded within the resin can affect the color. These inclusions often create a marbled or cloudy appearance, enhancing the amber’s character.
  4. Fluorescence: Some ambers fluoresce under UV light, producing unique colors such as blue. This is caused by the interaction of certain chemical compounds within the resin with ultraviolet rays.

Table: Amber Composition and Associated Colors

ComponentEffect on ColorExample
Iron oxideReddish hue“Cherry amber”
Sulfur compoundsYellow to green shades“Baltic green amber”
Organic inclusionsDarker or cloudy tonesFossilized ambers
Fluorescent compoundsBlue or luminescent shades“Dominican blue amber”

Amber’s composition and the conditions under which it formed make each piece unique. No two specimens are exactly alike, adding to its allure as a gemstone.


Geographic Influence on Amber Color

Amber is found in various regions worldwide, and its geographic origin often determines its color. Each location provides distinct environmental factors that influence amber’s appearance.

Table: Geographic Sources and Predominant Colors

RegionDominant ColorsNotable Features
Baltic Sea (Europe)Yellow, Golden, BrownLargest deposits; often fossil-rich
Dominican RepublicBlue, GreenKnown for rare fluorescent colors
Myanmar (Burma)Deep Brown, RedHighly prized ancient amber
MexicoYellow, RedUnique due to volcanic activity
CanadaBrown, GoldenContains prehistoric inclusions

Baltic amber, for instance, is renowned for its golden hues and is often found in jewelry. Meanwhile, Dominican amber’s rarity and exotic colors, such as blue, make it highly sought after by collectors.


Cultural and Historical Significance of Amber’s Color

Amber’s warm, glowing appearance has made it a symbol of energy, life, and warmth in many cultures. Its colors have played specific roles in traditions, beliefs, and even early scientific discoveries:

  • Ancient Times: Amber was referred to as “electron” in ancient Greece due to its ability to generate static electricity when rubbed. The golden glow of amber symbolized the sun and divine energy.
  • Jewelry and Adornments: Yellow and golden ambers were used as gemstones and talismans. Their bright hues were believed to protect against evil spirits.
  • Spiritual Symbolism: Red amber is often associated with vitality and passion, while green amber is linked to renewal and fertility in some cultures.
  • Trade and Economy: The “Amber Road” was a major trade route connecting Europe and Asia, emphasizing the value and desirability of amber’s rich colors.

Amber continues to hold a special place in modern jewelry and spiritual practices, where its diverse palette enhances its appeal.


WhatColorIsAmberA3
WhatColorIsAmberA4

Frequently Asked Questions

1. Can amber’s color change over time?

Yes, amber can darken due to oxidation and prolonged exposure to sunlight or air. Proper care, such as storing amber away from direct sunlight, can help preserve its original color.

2. Why is blue amber so rare?

Blue amber’s fluorescence under UV light is a result of unique chemical properties found predominantly in the Dominican Republic. Its rarity and mesmerizing glow make it one of the most valuable types of amber.

3. How can I identify real amber?

Authentic amber is lightweight, warm to the touch, and emits a pine-like scent when heated. It’s also less brittle than synthetic counterparts. A simple test involves floating amber in saltwater, as genuine amber is less dense than artificial imitations.

4. What factors affect the value of amber?

Color, clarity, and inclusions all play a role in determining amber’s value. Rare colors like blue and red, as well as pieces with well-preserved insect inclusions, are highly prized.


Conclusion

Amber’s color is a window into its origin, age, and composition. From the golden hues of the Baltic region to the rare blue shades of the Dominican Republic, amber continues to captivate collectors and enthusiasts worldwide. Its beauty and historical significance ensure that it remains one of nature’s most cherished treasures.

For further reading, explore the following references:


Recommended Articles:

What Can I Feed a Stray Cat: 2025 Comprehensive Guide – love a happy home
What to Do if You Find a Stray Dog 2025 – love a happy home

Makeup Looks: 2025 Finding Your Unique Style

MakeupLooksA1
MakeupLooksA2
MakeupLooksA3

Makeup Looks: 2025 Finding Your Unique Style

Makeup is a versatile form of self-expression that allows people to enhance their natural beauty or experiment with bold, creative designs. From minimalistic daytime styles to dramatic evening looks, makeup trends continue to evolve, offering endless possibilities. In this article, we’ll explore popular makeup looks, tips to achieve them, and how to make them uniquely yours.


1. The Natural Look: Effortless Elegance

The natural makeup look is a timeless choice that focuses on enhancing your features subtly. Ideal for everyday wear, this look exudes freshness and simplicity.

Key Features:

  • Dewy, glowing skin.
  • Neutral shades for eyes and lips.
  • Lightly groomed eyebrows.

Steps to Achieve It:

  1. Begin with a hydrating primer to prep your skin.
  2. Use a lightweight foundation or tinted moisturizer to even out your complexion.
  3. Add a touch of cream blush for a natural flush.
  4. Apply a neutral eyeshadow and a single coat of mascara.
  5. Finish with a tinted lip balm or nude lipstick.

Pro Tip: Use highlighter on the high points of your face—cheekbones, brow bones, and the bridge of your nose—for a radiant glow.


2. Glamorous Look: Red Carpet Ready

A glamorous look is perfect for formal events or a night out. It emphasizes bold features like smoky eyes or a striking lip color.

Key Features:

  • Full-coverage foundation for flawless skin.
  • Smoky or shimmery eyeshadow.
  • Defined cheekbones with contour and highlight.
  • Bold lipstick in shades like red or plum.

Steps to Achieve It:

  1. Apply a primer to create a smooth canvas.
  2. Use a full-coverage foundation and set it with powder.
  3. Contour your cheekbones, jawline, and nose.
  4. Create a smoky eye using dark and metallic eyeshadows, blending well.
  5. Finish with winged eyeliner and several coats of mascara or false lashes.
  6. Pair the look with a bold lipstick for maximum impact.

Pro Tip: Balance your features by choosing either a bold eye or a bold lip—not both.


3. No-Makeup Makeup: Polished and Subtle

The no-makeup makeup look is all about looking effortlessly polished. It’s a great choice for work, casual outings, or when you want to appear naturally flawless.

Key Features:

  • Sheer coverage for a “bare skin” effect.
  • Lightly defined brows.
  • Subtle enhancement of the eyes and lips.

Steps to Achieve It:

  1. Start with a moisturizer or BB cream for light coverage.
  2. Use concealer sparingly to cover blemishes.
  3. Fill in your brows lightly to maintain their natural shape.
  4. Curl your lashes and apply a single coat of mascara.
  5. Finish with a nude or clear lip gloss.

Pro Tip: Focus on skincare for this look—healthy skin is the foundation of natural beauty.


4. Artistic and Bold Looks: Unleash Creativity

Artistic makeup is for those who love to stand out and experiment with bold, unconventional designs. It’s a fun way to showcase creativity and individuality.

Key Features:

  • Bright and vibrant eyeshadow colors.
  • Graphic eyeliner styles.
  • Unique accents like glitter, rhinestones, or face paint.

Steps to Achieve It:

  1. Use a primer to ensure your makeup stays vibrant all day.
  2. Choose bold colors and experiment with blending and layering.
  3. Add details like graphic eyeliner or embellishments for a striking effect.
  4. Pair with a complementary lip shade, from neon to gradient tones.

Pro Tip: Experiment with new trends like holographic highlighter or metallic finishes to stay ahead of the curve.


Essential Tools for Every Look

To create flawless makeup looks, the right tools are a must. Here are some essentials:

  • Brushes and Sponges: Invest in high-quality brushes for precise application and sponges for seamless blending.
  • Primers and Setting Sprays: These ensure a smooth base and long-lasting wear.
  • Versatile Palettes: A good eyeshadow palette with a range of neutrals and bold colors is indispensable.
  • Lip Products: Keep a variety of lipsticks, glosses, and balms to suit different looks.

Tips for Flawless Makeup

  1. Know Your Skin: Tailor your products to your skin type—oily, dry, or combination.
  2. Practice Makes Perfect: Try new techniques and looks at home to build confidence.
  3. Blend Thoroughly: Seamless blending makes all the difference between amateur and professional makeup.
  4. Experiment with Trends: Explore seasonal colors, techniques, and finishes to keep your style fresh.

MakeupLooksA4
MakeupLooksA5

Conclusion

Makeup is more than just a routine; it’s an art form that allows you to express your personality and creativity. Whether you prefer a natural glow, glamorous drama, subtle no-makeup polish, or bold artistry, the key is to embrace what makes you feel confident and beautiful. Try these looks, experiment with trends, and let your makeup tell your unique story!

Reference Links:

The 8 Biggest Makeup Trends of 2024, According to Makeup Pros | Marie Claire

9 Top Makeup Trends of 2024, According to Makeup Artists

The 10 Biggest Beauty Trends for 2024

12 Makeup Trends That Will Dominate in 2024, Say Top MUAs | Who What Wear

Top Makeup Trends to Look Out for in 2024 – THE YESSTYLIST

Cosmetics – Wikipedia

Recommended Articles:

What Can I Feed a Stray Cat: 2025 Comprehensive Guide – love a happy home
What to Do if You Find a Stray Dog 2025 – love a happy home

Polygel Nails: 2025 Nail Revolution

PolygelNailsA5
PolygelNailsA1
PolygelNailsA2

Polygel Nails: The Complete Guide to This Nail Revolution
Polygel nails have taken the beauty world by storm, offering a hybrid solution for those who love the durability of acrylics and the flexibility of gels. Whether you’re new to nail enhancements or an experienced nail enthusiast, polygel nails are worth exploring. In this article, we’ll break down what polygel nails are, how they differ from other nail types, their benefits, and how to apply and maintain them.

What Are Polygel Nails?

Polygel is a versatile nail enhancement product that combines the best features of acrylic and gel nails. Unlike traditional acrylics, which involve a mix of liquid and powder, or gels that self-level and can be challenging to sculpt, polygel comes in a paste-like form. Packaged in a tube, it offers a smooth and malleable consistency that allows for easy application and shaping.

Polygel hardens only when cured under a UV or LED lamp, giving users as much time as needed to achieve their desired look. This makes it a favorite among both professional nail technicians and DIY users.


How Polygel Nails Differ From Other Enhancements

Polygel nails are a unique option compared to other popular nail enhancement methods. Here’s how they stack up:

  1. Acrylic Nails:
  • Durability: Acrylics are extremely strong, but they can feel heavy and are prone to cracking.
  • Application: Requires mixing liquid monomer with powder polymer, which can emit strong chemical odors.
  • Removal: Often requires soaking in acetone, which can weaken the natural nails.
  1. Gel Nails:
  • Flexibility: Gel nails are more flexible than acrylics but are less durable and may chip.
  • Consistency: Gels are self-leveling, which makes them harder to sculpt into precise shapes.
  • Lifespan: Typically requires touch-ups more frequently than acrylics or polygel.
  1. Polygel Nails:
  • Lightweight Durability: Polygel nails are strong yet flexible, reducing the risk of breakage.
  • Odor-Free Application: No harsh chemical smells during application.
  • Customizable: Can be used for overlays, extensions, and intricate nail art.

Benefits of Polygel Nails

Polygel nails are gaining popularity for several reasons:

  1. Odor-Free and Non-Toxic: Unlike acrylic nails, polygel doesn’t emit strong chemical fumes.
  2. Lightweight Feel: They are significantly lighter on the nails, making them more comfortable to wear.
  3. Long-Lasting Results: When properly applied, polygel nails can last up to 3–4 weeks without lifting or chipping.
  4. Customizable Application: Whether you prefer short and natural or long and dramatic, polygel allows for easy customization.
  5. Gentler on Natural Nails: Polygel is less damaging than acrylics, especially when removed correctly.

How to Apply Polygel Nails

The application process is simple and can be done at home with the right tools. Here’s a step-by-step guide:

  1. Prepare the Nails:
  • Clean the nails and push back the cuticles.
  • Buff the nail surface to remove shine, ensuring better adhesion.
  • Apply a base coat and cure it under a UV or LED lamp.
  1. Apply the Polygel:
  • Squeeze a small bead of polygel from the tube onto a spatula.
  • Place the polygel onto the nail or a nail form, depending on the desired length.
  1. Shape the Nail:
  • Dip a brush into a slip solution to prevent sticking.
  • Gently shape the polygel into the desired form, ensuring even thickness.
  1. Cure the Polygel:
  • Place your hand under a UV or LED lamp to cure the polygel. Curing time depends on the lamp but typically takes 30–60 seconds.
  1. Refine the Shape:
  • After curing, file and buff the nails to achieve the final shape.
  • Apply a top coat for added shine and cure again.

Maintaining Polygel Nails

To make your polygel nails last longer, follow these tips:

  • Avoid Excessive Force: Treat your nails gently to prevent lifting or breakage.
  • Moisturize Regularly: Keep your cuticles hydrated to maintain overall nail health.
  • Use Gloves: Protect your nails from harsh chemicals when cleaning or doing chores.
  • Schedule Fills: If your nails grow out, consider getting a fill instead of a full removal.

Polygel Removal Process

Removing polygel nails correctly is essential to protect your natural nails:

  1. File Down the Polygel: Use a nail file to reduce the bulk of the product.
  2. Soak in Acetone: Wrap your nails with acetone-soaked cotton pads and aluminum foil. Let them sit for 10–15 minutes.
  3. Gently Remove Residue: Use a cuticle pusher to scrape off softened polygel, then buff the nail surface.

Who Should Try Polygel Nails?

Polygel nails are perfect for anyone who wants durable, lightweight, and customizable nails. They’re ideal for beginners and professionals alike, thanks to their ease of use and long-lasting results. Whether you want a natural finish or bold nail art, polygel can help you achieve it.


PolygelNailsA3
PolygelNailsA4

Final Thoughts

Polygel nails offer an innovative solution for beautiful, durable nails without the drawbacks of traditional acrylics or gels. Their lightweight feel, easy application, and versatile design possibilities make them a favorite among nail enthusiasts. With proper care, polygel nails can provide salon-quality results for weeks.
So why wait? Try polygel nails today and experience the perfect blend of strength and flexibility!
Artificial nails – Wikipedia

Manicure – Wikipedia

Nail polish – Wikipedia

Nail art – Wikipedia

Recommended Articles:

What Can I Feed a Stray Cat: 2025 Comprehensive Guide – love a happy home

What to Do if You Find a Stray Dog 2025 – love a happy home

Mouse Pretty Makeup: 2025 Whimsical Beauty Trend

MousePrettyMakeupA1
MousePrettyMakeupA2

Mouse Pretty Makeup: A Whimsical Beauty Trend Worth Trying

In the world of beauty, trends emerge and evolve, reflecting creativity and self-expression. One of the latest to capture attention is Mouse Pretty Makeup—a charming, playful style inspired by the delicate features of mice. This trend combines artistry with a touch of whimsy, creating looks that are equal parts adorable and imaginative. Whether for cosplay, social media, or personal fun, Mouse Pretty Makeup offers a refreshing take on creative cosmetics.

In this article, we explore what makes this trend special, how to achieve it, and why it has become a favorite among beauty enthusiasts.


What Is Mouse Pretty Makeup?

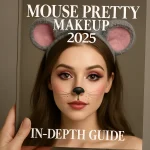
Mouse Pretty Makeup is a unique makeup style that mimics the soft, innocent features of mice. It focuses on accentuating specific traits such as large, bright eyes, blushed cheeks, and dainty whiskers. While it draws inspiration from mice, the trend is far from literal—it’s a creative interpretation that allows for endless customization.

This style has gained popularity for its versatility. From subtle, natural enhancements for daily wear to bold, theatrical designs for costume events, Mouse Pretty Makeup adapts to different levels of expression. The trend also aligns with a broader cultural appreciation for cute and animal-inspired aesthetics, often seen in fashion, art, and social media.


The Key Features of Mouse Pretty Makeup

Mouse Pretty Makeup is characterized by several distinct elements, each contributing to its playful charm. Here’s what defines the look:

1. Whisker Details

Thin, delicate lines drawn on the cheeks to represent whiskers are a hallmark of this trend. These can be subtle or bold, depending on your desired level of impact.

2. Button Nose Accent

A small, rounded dot on the tip of the nose—usually black or dark brown—captures the essence of a mouse’s button-like nose. This feature is often paired with contouring to emphasize the nose’s shape.

3. Big, Round Eyes

Mice are known for their expressive eyes, and this look recreates them with clever makeup techniques. White eyeliner on the lower lash line, extended winged eyeliner, and false lashes or mascara all help achieve a wide-eyed effect.

4. Rosy Cheeks

Soft pink or peach blush applied generously to the cheeks gives a youthful, flushed appearance. This step is essential for mimicking the delicate, warm tones of a mouse’s face.

5. Ear Accessories

While not part of the makeup itself, accessories like mouse-ear headbands or hairstyles resembling ears (e.g., buns) are often added to complete the look. These playful additions enhance the overall aesthetic.


How to Achieve Mouse Pretty Makeup

Creating a Mouse Pretty Makeup look is simpler than it seems. Here’s a step-by-step guide to help you try it yourself:

Step 1: Prep Your Canvas

Start with a clean, moisturized face. Apply a lightweight foundation or BB cream for an even base, and set it with translucent powder to prevent smudging.

Step 2: Highlight the Eyes

  • Use neutral or pastel eyeshadow tones to create a soft, dreamy look.
  • Apply white eyeliner along your lower waterline to make your eyes appear larger.
  • Use black eyeliner to draw a subtle wing, extending it slightly downward for a “droopy eye” effect that mimics a mouse’s gaze.
  • Finish with mascara or false lashes for extra volume.

Step 3: Add Mouse Features

  • Using a fine brush and eyeliner, draw three thin whiskers on each side of your face, starting from the nose and extending outward.
  • Add a small black dot on the tip of your nose to replicate a mouse’s nose.

Step 4: Blush and Highlight

  • Apply blush generously to the apples of your cheeks and blend upward toward the temples.
  • Use a highlighter on your cheekbones and the bridge of your nose for a radiant glow.

Step 5: Final Touches

  • For the lips, choose a natural shade or a soft pink gloss to keep the focus on your facial features.
  • Add a headband with mouse ears or style your hair into two buns to mimic ears.

Mouse Pretty Makeup has become a global phenomenon for several reasons:

1. Social Media Influence

Platforms like Instagram and TikTok are key drivers of beauty trends. With its visually appealing and creative elements, Mouse Pretty Makeup is perfect for sharing on social media, sparking curiosity and admiration.

2. Playful Self-Expression

In an era where beauty is celebrated as a form of art, this trend allows individuals to experiment with new styles without taking themselves too seriously. It’s a lighthearted way to express creativity.

3. Nostalgia and Whimsy

The look taps into childhood nostalgia and the universal love for small, cute animals. By embracing the innocence associated with mice, it offers an escape from everyday routines.

4. Versatility

From casual day looks to elaborate cosplay events, Mouse Pretty Makeup is highly adaptable. This versatility makes it accessible to both beginners and experienced makeup artists.


Tips for Perfecting the Look

  • Practice Makes Perfect: Drawing whiskers and shaping the nose accent may take a few tries, so don’t be discouraged if it’s not perfect initially.
  • Use Quality Products: Smudge-proof eyeliner and long-lasting blush ensure your look stays intact throughout the day.
  • Customize to Your Style: Whether you prefer a minimalist approach or a dramatic flair, adapt the trend to suit your preferences.

MousePrettyMakeupA3

Conclusion

Mouse Pretty Makeup is more than a fleeting beauty fad; it’s a celebration of artistry, fun, and individuality. With its charming features and creative possibilities, this trend is a delightful way to explore makeup beyond the conventional. Whether you’re looking to stand out at an event or simply try something new, Mouse Pretty Makeup invites you to embrace your playful side and create a look that’s as unique as you are.

Cosmetics – Wikipedia

What Can I Feed a Stray Cat: 2025 Comprehensive Guide – love a happy home

What to Do if You Find a Stray Dog 2025 – love a happy home

Builder Gel Nails: 2025 Perfect, Long-Lasting Nails

BuilderGelNailsA1
BuilderGelNailsA2

Builder Gel Nails: 2025 The Ultimate Guide for Perfect, Long-Lasting Nails

Builder gel nails have revolutionized the nail industry, providing a strong and versatile option for nail enhancements. Whether you’re looking to add length, strengthen your natural nails, or create a flawless canvas for nail art, builder gel is an excellent choice. In this article, we’ll explore what builder gel nails are, their benefits, application techniques, and maintenance tips to help you achieve salon-worthy nails.


What Are Builder Gel Nails?

Builder gel is a thick, high-viscosity gel used to create strong and durable nail extensions or overlays. Unlike traditional nail polish or basic gel polish, builder gel is designed to add structure and support to the nails, making it ideal for those with brittle or short nails.

The gel is cured under a UV or LED lamp, which hardens it into a durable layer. Once cured, builder gel can be filed and shaped to achieve the desired look. It’s commonly used by professional nail technicians but is also popular among DIY enthusiasts.


Benefits of Builder Gel Nails

  1. Strength and Durability
    Builder gel nails are highly resistant to chipping and cracking, making them perfect for everyday wear. They provide a sturdy protective layer that allows natural nails to grow underneath without breaking.
  2. Natural Appearance
    Unlike acrylic nails, builder gel offers a natural finish. Its clear or neutral-toned base seamlessly blends with the natural nail, making it a subtle yet effective enhancement.
  3. Customizable Length and Shape
    With builder gel, you can achieve various nail shapes and lengths, from short and square to long and almond-shaped. The gel can be molded and sculpted to match your style.
  4. Versatility
    Builder gel serves as an excellent base for nail art, gel polish, or other decorative elements. Its smooth surface allows for creative designs that last longer.
  5. Non-Toxic Formula
    Most builder gels are free of harmful chemicals like formaldehyde, making them a safer option for nail enthusiasts.

How to Apply Builder Gel Nails

1. Gather Your Tools:
You’ll need a builder gel kit, a nail file, a buffer, a cuticle pusher, a UV/LED lamp, and rubbing alcohol or a cleanser.

2. Prep the Nails:

  • Remove any old polish and trim your nails.
  • Gently push back your cuticles and file the nails into your desired shape.
  • Buff the nail surface lightly to remove shine and ensure better adhesion.

3. Apply a Base Coat:
Apply a thin layer of gel base coat to your nails and cure it under the UV/LED lamp for the recommended time.

4. Apply the Builder Gel:

  • Using a brush, apply a small amount of builder gel to the center of your nail.
  • Spread it evenly towards the edges, ensuring the gel covers the entire nail without touching the skin or cuticles.
  • Cure under the UV/LED lamp.

5. Build the Structure:
For added strength or extensions, apply additional layers of builder gel, curing each layer before proceeding. Use nail forms if you’re extending the nail length.

6. Shape and Refine:
Once cured, use a nail file to shape the nails and smooth the surface.

7. Finish with Top Coat:
Seal the nails with a gel top coat for added shine and protection, then cure under the lamp.


Maintenance Tips for Builder Gel Nails

  1. Hydrate Your Cuticles
    Keep your cuticles moisturized with cuticle oil to maintain healthy nails and prevent lifting.
  2. Avoid Using Nails as Tools
    Builder gel is durable, but using your nails to open cans or scrape surfaces can weaken them.
  3. Rebalance Regularly
    Visit your nail technician or perform a fill every 2-3 weeks to maintain the integrity of your builder gel nails.
  4. Use Gentle Removal Methods
    Avoid peeling or prying off builder gel. Instead, soak your nails in acetone to gently remove the gel without damaging the natural nail.

Why Choose Builder Gel Over Other Nail Enhancements?

Builder gel offers several advantages over alternatives like acrylics or dip powder. It’s more flexible than acrylic, reducing the risk of nail damage, and doesn’t require harsh filing for removal. Additionally, builder gel is less prone to yellowing and provides a sleeker finish.

For those looking to strengthen their natural nails, builder gel can also act as a protective barrier, allowing natural nails to grow without splitting or breaking.

BuilderGelNailsA3
BuilderGelNailsA4
BuilderGelNailsA5

Conclusion

Builder gel nails are a game-changer for anyone looking to achieve long-lasting, beautiful nails. Their strength, versatility, and natural appearance make them a top choice for both professionals and DIY enthusiasts. By following the correct application and maintenance techniques, you can enjoy flawless nails that turn heads.

Whether you’re aiming for elegant simplicity or bold nail art, builder gel is the perfect foundation for your creativity. Give it a try and elevate your nail game to the next level!

Reference Links:

The Ultimate Guide to Gel Builder: Strong, Beautiful Nails Made Easy

What is Builder Gel? | Benefits & How to Use It – Dan’s Nails | 2024 All Rights Reserved

Builder Gel Guide: How to Use It Right for Minimal Damage

Everything You Need to Know About Builder Gels: Your Guide to Perfect, – Naio Nails

Gel Nail Techniques: How to Safely Apply and Remove Builder Gel | Essential Nails

Artificial nails – Wikipedia

Manicure – Wikipedia

Nail polish – Wikipedia

Nail art – Wikipedia

Recommended Articles:

Toy Poodle: The Perfect Petite Companion – love a happy home (loveahh.com)

Trendy Short Gel Nails: 2025 Style Meets Practicality

TrendyShortGelNailsA1
TrendyShortGelNailsA2

Trendy Short Gel Nails: Style Meets Practicality

Short gel nails are making waves in the beauty world, proving that you don’t need long, extravagant nails to make a fashion statement. Perfect for those seeking a balance between chic aesthetics and everyday practicality, short gel nails are versatile, durable, and trendy. Whether you’re a minimalist or love experimenting with bold designs, short gel nails are a fabulous way to express your personal style.

Why Short Gel Nails Are a Game-Changer

1. Practical and Comfortable

Short nails are incredibly functional, allowing you to carry out daily tasks like typing, cooking, or playing sports without the hassle of long nails getting in the way. Gel polish enhances their durability, making them resistant to chips and cracks, ensuring your manicure lasts longer than traditional options.

2. Low-Maintenance Beauty

For those with a busy lifestyle, short gel nails offer a perfect solution. They require minimal upkeep while providing a polished, professional look that can last up to three weeks. Their shorter length also reduces the likelihood of breakage, saving you frequent trips to the nail salon.

3. Trend Versatility

Short nails are no longer seen as plain or basic. With modern techniques and an array of design possibilities, they can be just as stylish as longer nails. From classic nude shades to intricate nail art, short gel nails offer endless options to suit your mood and occasions.


1. Classic French Tips

French tips are timeless and elegant, making them a popular choice for short nails. Update the look by using vibrant colors or metallic shades for the tips instead of traditional white.

2. Playful Minimalism

Minimalist designs are ideal for short nails. Opt for simple geometric patterns, dainty dots, or single-line art. Neutral or soft pastel backgrounds paired with subtle detailing exude sophistication.

3. Pop of Color

Bright, bold colors make a statement even on shorter nails. Shades like fuchsia, cobalt blue, and sunny yellow are trending this season. For an added twist, experiment with color-blocking or ombre effects.

4. Abstract Nail Art

Abstract designs are perfect for short nails. Think asymmetrical shapes, watercolor-style washes, or mixed textures. This trend gives you room to play with colors and create a unique, artsy look.

5. Glitter and Glam

Short nails can shine just as brightly as long ones. Add glitter accents, metallic foils, or a chrome finish to elevate your nails for a special event. A touch of sparkle can transform even the simplest designs into something eye-catching.

6. Seasonal and Themed Designs

Tailor your nails to the season or a special event. Winter-themed nails with icy blues and snowflakes, floral designs for spring, tropical hues for summer, and warm earthy tones for fall are fantastic ways to stay on trend year-round.


How to Achieve Flawless Short Gel Nails

1. Preparation is Key

Start with clean, well-shaped nails. Trim and file them to your desired shape—squoval and rounded edges are particularly flattering for short nails. Push back your cuticles and lightly buff the surface to help the gel polish adhere better.

2. Use Quality Products

Invest in high-quality gel polishes, base coats, and top coats. These products not only ensure vibrant colors and smooth application but also contribute to the longevity of your manicure.

3. Proper Application Technique

Apply thin, even coats of gel polish to avoid bulkiness, which can overwhelm shorter nails. Cure each layer under a UV or LED lamp according to the polish instructions to ensure durability.

4. Top Coat for the Win

The top coat is essential for sealing your design and adding a glossy or matte finish. It also protects your nails from chipping, keeping your manicure fresh for weeks.

5. Nail Aftercare

To maintain healthy nails, hydrate your cuticles regularly with oil and keep your hands moisturized. Avoid using your nails as tools to minimize wear and tear.


Why Short Gel Nails Are Perfect for Everyone

Short gel nails cater to a wide range of preferences and lifestyles. They’re ideal for working professionals, parents, students, or anyone who loves the look of a chic manicure without the challenges of long nails.

They also provide an excellent canvas for experimentation. You can go bold with bright shades, stay chic with neutral tones, or try something trendy like abstract art or glitter tips. Plus, their durability and long-lasting nature make them a cost-effective and practical beauty choice.

TrendyShortGelNailsA3
TrendyShortGelNailsA4

Embrace the Short Nail Revolution

Gone are the days when long nails were the epitome of style. Today, short gel nails are celebrated for their modern, practical, and stylish appeal. They’re proof that great things can come in small packages, offering endless design possibilities and the convenience of easy maintenance.

Whether you’re a minimalist at heart or someone who loves bold and daring designs, short gel nails allow you to express yourself in a way that’s both fashionable and functional. So, why not give them a try? Your hands—and your busy schedule—will thank you.

Artificial nails – Wikipedia

Manicure – Wikipedia

Nail polish – Wikipedia

Nail art – Wikipedia

Toy Poodle: The Perfect Petite Companion – love a happy home (loveahh.com)

Makeup Bag: 2025 Your Beauty Companion

MakeupBagA4
MakeupBagA1
MakeupBagA2

Makeup Bag: 2025 Your Beauty Companion

A makeup bag is more than just a convenient container; it is an essential part of a beauty routine. Whether you’re a makeup minimalist or a beauty enthusiast, having the right makeup bag makes your routine efficient and stress-free. This guide explores the importance of a good makeup bag, tips for choosing the perfect one, and the essentials every makeup bag should have.


Why Every Beauty Lover Needs a Makeup Bag

A well-organized makeup bag is indispensable for anyone who wants to simplify their beauty routine. It offers several key benefits:

  1. Convenience: A makeup bag keeps all your beauty essentials in one place, making it easier to locate what you need, whether you’re at home or on the go.
  2. Portability: For those who travel or frequently move between locations, a makeup bag is the ideal way to bring your favorite products along.
  3. Protection: A sturdy makeup bag protects your products from damage and spills, ensuring they last longer.
  4. Organization: With compartments or pockets, a makeup bag helps you categorize items like brushes, lipsticks, and skincare products, making your routine faster and more efficient.

Choosing the Right Makeup Bag

When selecting a makeup bag, consider factors that fit your lifestyle and preferences:

  1. Size and Capacity:
    • Small: Ideal for essentials like mascara, lipstick, and compact powder.
    • Medium: Perfect for daily routines, offering enough space for foundation, brushes, and a small palette.
    • Large: Suitable for makeup artists or beauty lovers with extensive collections.
  2. Material:
    • Leather: Durable and luxurious but requires more care.
    • Nylon or Polyester: Lightweight, waterproof, and easy to clean.
    • Clear Plastic: Perfect for visibility and travel compliance.
  3. Compartments and Organization:
    • Look for bags with multiple compartments to separate items like liquids, powders, and tools.
  4. Style:
    • Choose a design that reflects your personality. From sleek and minimalist to vibrant patterns, there’s a makeup bag for every taste.

How to Organize Your Makeup Bag

An organized makeup bag saves time and prevents frustration. Follow these tips to keep your bag tidy:

  1. Declutter Regularly:
    • Remove expired products or those you no longer use.
  2. Sort by Categories:
    • Group similar items, such as face products, eye makeup, and tools.
  3. Use Mini Containers:
    • Store small items like tweezers, hairpins, or cotton swabs in tiny pouches to avoid losing them.
  4. Keep it Clean:
    • Wipe the interior regularly to prevent product residue buildup.

Essentials for Every Makeup Bag

The contents of a makeup bag vary depending on individual preferences, but some staples are universal:

  1. Face Essentials:
    • Foundation or BB cream
    • Concealer
    • Setting powder or spray
    • Blush or bronzer
  2. Eye Makeup:
    • Mascara
    • Eyeliner
    • Neutral eyeshadow palette
    • Eyebrow pencil or gel
  3. Lip Products:
    • Lip balm
    • A go-to lipstick or gloss
    • Lip liner
  4. Tools:
    • Makeup brushes or blending sponges
    • Tweezers
    • Eyelash curler
    • A compact mirror
  5. Extras:
    • Makeup remover wipes
    • Mini skincare items (e.g., moisturizer, sunscreen)
    • Hair ties or bobby pins

Travel-Friendly Makeup Bags

For frequent travelers, a travel-friendly makeup bag is a must-have. Look for features like:

  1. Clear Sections: Comply with airport regulations and make products easy to find.
  2. Leak-Proof Compartments: Prevent spills from damaging other items in your luggage.
  3. Compact Size: Ensure the bag fits easily into your carry-on or handbag.

The beauty industry is constantly evolving, and so are makeup bags. Current trends include:

  1. Sustainable Materials: Bags made from recycled or eco-friendly materials are becoming more popular.
  2. Personalization: Many brands now offer customizable makeup bags, allowing you to add initials, colors, or unique designs.
  3. Tech Integration: Some makeup bags feature built-in lights or mirrors for added convenience.

Maintaining Your Makeup Bag

To ensure your makeup bag stays in good condition:

  1. Regular Cleaning: Wipe down the bag and clean makeup tools regularly to maintain hygiene.
  2. Monitor Expiry Dates: Discard expired products to avoid skin irritation.
  3. Organize Often: Regularly check your bag to keep it neat and ensure it contains only what you need.

MakeupBagA3
MakeupBagA5

Conclusion

A makeup bag is more than a storage solution; it’s an essential part of a beauty routine that reflects your style and priorities. Whether you prefer a small pouch for touch-ups or a large organizer for your entire collection, choosing the right makeup bag can elevate your beauty experience.

Invest in a high-quality makeup bag, stock it with your favorite products, and keep it well-maintained to ensure it remains a trusted companion in your daily life.

Cosmetics – Wikipedia

Toy Poodle: The Perfect Petite Companion – love a happy home (loveahh.com)

Wedding Makeup Looks: 2024 Ultimate Guide

WeddingMakeupLooksA1
WeddingMakeupLooksA2
WeddingMakeupLooksA3

2024 The Ultimate Guide to Wedding Makeup Looks

Wedding makeup is an essential part of a bride’s big day. It’s about enhancing natural beauty, complementing the theme, and ensuring a flawless look for the cameras. This guide will cover trending wedding makeup styles, expert tips, product recommendations, and practical advice to help you choose the best look for your wedding day.


StyleFeaturesPerfect ForKey Products
Natural GlowLight foundation, pink blush, soft lipsOutdoor, garden, or beach weddingsTinted moisturizer, cream blush
Classic EleganceDefined eyeliner, neutral lips, matte finishTraditional or ballroom ceremoniesMatte foundation, neutral lipstick
Romantic LookRosy cheeks, soft eyeshadow, gloss lipsIntimate or bohemian weddingsSatin foundation, pastel eyeshadow
Glamorous DramaSmokey eyes, bold lips, highlighterBlack-tie or evening weddingsHigh-pigment eyeshadow, contour palette
Vintage GlamRed lips, winged eyeliner, porcelain skinRetro-themed weddingsRed lipstick, liquid eyeliner

2. Choosing the Right Makeup for Your Theme and Features

The perfect wedding makeup depends on several factors:

a) Wedding Theme

  • Rustic/Outdoor: Opt for a natural glow or boho chic style.
  • Formal/Traditional: Go for classic elegance with defined eyes and a matte finish.

b) Skin Tone and Features

  • Fair Skin: Soft pinks, peaches, and neutral tones enhance your natural complexion.
  • Medium Skin: Warm golds, corals, and terracotta shades are flattering.
  • Deep Skin: Bold hues like ruby red, plum, and bronze look stunning.

c) Season and Venue

  • Summer: Waterproof and sweat-proof products are essential.
  • Winter: Hydrating primers and satin finishes prevent dryness.

3. Step-by-Step Guide to Achieving the Perfect Bridal Look

a) Pre-Wedding Preparation

  • 3–6 Months Before: Focus on skincare. Schedule facials and use SPF to prevent discoloration.
  • 1 Month Before: Conduct a makeup trial with your artist or practice your DIY look.
  • 1 Week Before: Hydrate, exfoliate, and avoid any new skincare products.

b) Wedding Day Makeup Application

  1. Primer: Use a primer suited to your skin type for a smooth base.
  2. Foundation: Apply a long-lasting, full-coverage foundation. Blend thoroughly.
  3. Eyeshadow: Choose shades that match your theme and complement your eye color.
  4. Eyeliner and Lashes: Use waterproof eyeliner and add false lashes for definition.
  5. Blush and Contour: Apply blush to the apples of your cheeks and contour lightly for definition.
  6. Lips: Line lips before applying a transfer-proof lipstick.
  7. Setting Spray: Lock in your look with a setting spray.

4. Top Products for Bridal Makeup

Product TypeTop BrandsWhy It’s Recommended
PrimerSmashbox Photo Finish, Milk Hydro GripProlongs makeup wear, smoothens skin
FoundationEstée Lauder Double Wear, NARS Sheer GlowLong-lasting, flawless coverage
Eyeshadow PaletteUrban Decay Naked, Natasha Denona GlamVersatile shades, high pigment payoff
MascaraL’Oréal Lash Paradise, Benefit Bad Gal BangWaterproof, adds volume and length
LipstickMAC Matte Lipstick, Charlotte Tilbury KISSLong-wearing, rich pigmentation
Setting SprayUrban Decay All NighterKeeps makeup intact for hours

5. Professional vs. DIY Wedding Makeup

OptionAdvantagesDisadvantages
Professional MakeupFlawless finish, stress-freeHigh cost, requires advanced booking
DIY MakeupCost-effective, full control over the processTime-consuming, skill-dependent

Tip: If you opt for DIY makeup, practice extensively and invest in high-quality products.


6. Tips for Long-Lasting Wedding Makeup

  • Layer Products: Apply thin layers for foundation, powder, and blush.
  • Choose Waterproof Formulas: Especially for mascara and eyeliner.
  • Blot, Don’t Rub: Use blotting papers to remove excess oil without disrupting your makeup.
  • Touch-Up Kit: Include essential items like lipstick, blotting papers, and a mini setting spray.

Expert Recommendations

  • Lisa Eldridge, Makeup Artist:
    “Wedding makeup should enhance your natural beauty. Focus on timeless elements that will look great in photos for years.”
  • Huda Kattan, Beauty Entrepreneur:
    “Invest in quality primers and setting sprays. These two products make all the difference for a long-lasting look.”
WeddingMakeupLooksA4
WeddingMakeupLooksA5

References

  1. The Knot – Wedding Makeup Tips
  2. Brides – Best Bridal Makeup Looks
  3. Makeup.com – Wedding Day Essentials
  4. Sephora – Bridal Makeup Products

By following these guidelines, you’ll not only look stunning on your big day but also feel confident and camera-ready. Choose a look that reflects your personality and creates memories to cherish forever.

Recommended Articles:

Toy Poodle: The Perfect Petite Companion – love a happy home (loveahh.com)

Christmas Makeup Looks: 2024 Glamorous Ideas

ChristmasMakeupLooksA1
ChristmasMakeupLooksA2
ChristmasMakeupLooksA3

Christmas Makeup Looks: 2024 Glamorous Ideas for the Festive Season

The holiday season is the perfect time to embrace bold, sparkling, and glamorous makeup looks that capture the festive spirit. Whether you’re attending Christmas parties, family gatherings, or New Year’s Eve celebrations, the right makeup can elevate your entire look. This article dives into creative Christmas makeup ideas, tips, and trends to inspire you this festive season.


1. Bold Red Lips

A classic red lip never goes out of style, especially during the holidays. Pair it with neutral eye makeup for a timeless look, or go bold with smoky eyes for extra drama.

2. Glittery Eyeshadow

Shimmery eyeshadow in gold, silver, or metallic shades is a staple for Christmas. It adds a touch of sparkle, making your eyes pop in festive lighting.

3. Frosty Highlighter

Opt for icy or champagne-toned highlighters to give your skin a radiant, frosty glow reminiscent of a winter wonderland.

4. Festive Green and Red Eyeshadow

Experiment with bold green or red eyeshadows, either as a subtle liner or a full-blown smoky look. This trend is perfect for those who want to incorporate traditional Christmas colors into their makeup.

5. Dramatic Winged Liner

A sharp, winged liner paired with bold lashes can add a chic and sophisticated edge to your look.


Essential Christmas Makeup Tips

StepTip
Skin PrepUse a hydrating primer to keep your makeup flawless despite dry winter air.
Base MakeupOpt for a long-lasting foundation to keep your look intact through long celebrations.
EyeshadowApply an eyeshadow primer to ensure pigments stay vibrant all evening.
LipsExfoliate and hydrate lips before applying lipstick to prevent cracking.
Setting SprayFinish with a setting spray to lock in your makeup for hours.

Detailed Christmas Makeup Looks

1. Classic Glam Look

  • Face: Start with a matte foundation, contour lightly, and add a champagne-toned highlighter.
  • Eyes: Apply gold eyeshadow on the lid and brown in the crease. Add winged liner and finish with voluminous lashes.
  • Lips: A bold red lipstick completes the classic Christmas vibe.

2. Ice Queen Look

  • Face: Use a luminous foundation for a dewy base. Apply an icy highlighter on cheekbones, nose, and cupid’s bow.
  • Eyes: Use silver and blue shimmery eyeshadow for a frosty effect. Add white eyeliner on the waterline.
  • Lips: Choose a pale pink or nude gloss.

3. Bold and Festive Look

  • Face: Go for full-coverage foundation and a warm bronzer.
  • Eyes: Use green eyeshadow on the lid and red in the crease. Add glitter for extra flair.
  • Lips: A neutral lip balances out the bold eye look.

CategoryProduct RecommendationPrice Range (USD)
PrimerSmashbox Photo Finish Primer$36
FoundationEstee Lauder Double Wear Foundation$48
Eyeshadow PaletteUrban Decay Naked Honey Palette$49
HighlighterBecca Shimmering Skin Perfector in Champagne Pop$38
LipstickMAC Retro Matte Lipstick in Ruby Woo$25
Setting SprayUrban Decay All-Nighter Setting Spray$33

How to Choose Your Christmas Makeup Look

1. Match Your Outfit

  • Glittery or metallic makeup pairs well with sequin dresses.
  • A classic red lip complements traditional holiday colors like green and white.

2. Consider the Occasion

  • For casual family gatherings, opt for subtle, glowy makeup.
  • For formal events or parties, go bold with dramatic eyes or lips.

3. Tailor to Your Skin Tone

  • Fair Skin: Icy tones like silver and pale pink.
  • Medium Skin: Golds, warm reds, and bronzes.
  • Dark Skin: Deep reds, purples, and bold metallics.

Expert Tips for Flawless Holiday Makeup

  1. Prep Your Skin: Winter can dry out your skin. Hydrate and exfoliate beforehand for a smooth canvas.
  2. Layer Carefully: Build your makeup in light layers to avoid a cakey finish.
  3. Invest in Quality Products: Festive events last hours, so high-quality, long-lasting products are worth the investment.
  4. Add Glitter Strategically: Use cosmetic-grade glitter to avoid irritation and keep the sparkle where it belongs.

Inspiration from Makeup Artists and Influencers

  • Pat McGrath: Known for her bold use of color and sparkle, Pat’s Instagram features festive looks perfect for Christmas.
  • Lisa Eldridge: Her tutorials on classic and wearable looks can help you nail the holiday vibe.
  • Nikkie Tutorials: A go-to for vibrant and dramatic Christmas makeup ideas.

Conclusion

Christmas makeup is all about expressing joy and creativity through bold colors, sparkles, and classic touches. Whether you prefer a subtle glow or a dramatic transformation, there’s a festive look for everyone. Experiment with the ideas above, and don’t forget to capture your glamorous look in photos to remember the holiday magic!

ChristmasMakeupLooksA4
ChristmasMakeupLooksA5

References

  1. Pat McGrath Labs
  2. Sephora Makeup Trends
  3. Lisa Eldridge Official Website
  4. Nikkie Tutorials YouTube Channel

Recommended Articles:

Toy Poodle: The Perfect Petite Companion – love a happy home (loveahh.com)