Milk is a staple food worldwide, found in almost every household. Whether you’re a chef, a scientist, or just curious, understanding the weight of a gallon of milk can be surprisingly useful. This comprehensive guide will explore how much a gallon of milk weighs, the factors that influence its weight, and its implications in various fields.
What is the Weight of a Gallon of Milk?
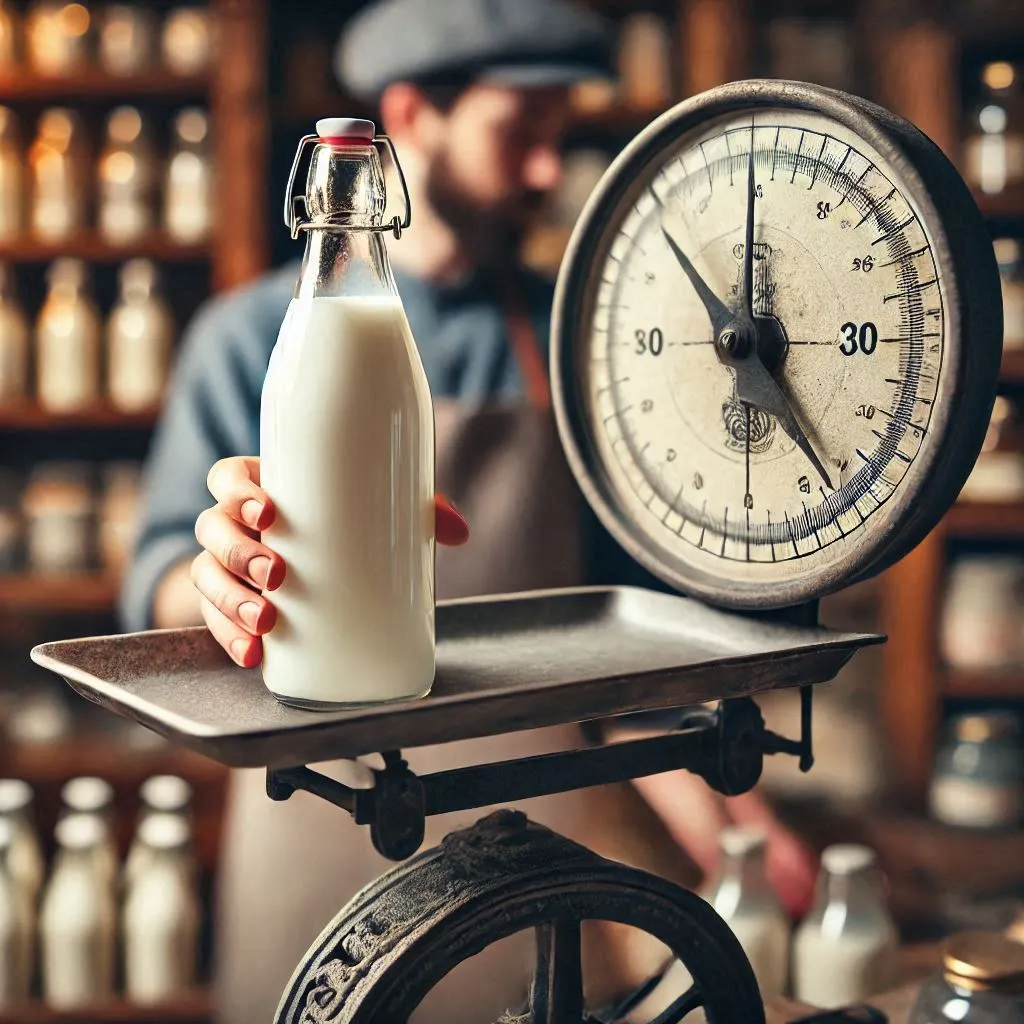
On average, a gallon of milk weighs 8.6 pounds (3.9 kilograms). This weight can fluctuate depending on factors such as the milk’s fat content, temperature, and additives.
Type of Milk
Weight per Gallon (lbs)
Weight per Gallon (kg)
Whole Milk
8.6
3.90
2% Reduced-Fat Milk
8.5
3.86
1% Low-Fat Milk
8.4
3.81
Skim Milk
8.3
3.76
Heavy Cream
8.8
4.00
These figures reflect the density of milk, which depends on its water, fat, and solid content.
Milk Composition and Density
Milk’s weight stems from its density, which varies with its composition. The primary components of milk are:
Water (87%) Water is the primary ingredient in milk, contributing to its overall weight.
Fat (0.1% to 4%) Fat content varies by milk type. Higher fat levels slightly decrease density since fat is lighter than water.
Proteins and Solids (13%) Proteins like casein and lactose contribute to milk’s density, affecting its overall weight.
Factors Affecting the Weight of Milk
1. Fat Content
Fat is less dense than water, meaning milk with higher fat content weighs less per unit of volume. Whole milk, with 3.25% fat, weighs slightly more than skim milk, which has almost no fat.
2. Temperature
Milk expands when warmed, reducing its density and weight per gallon. Conversely, cold milk is denser and slightly heavier.
3. Additives and Fortification
Some milk varieties are fortified with vitamins, minerals, or additives that can alter their density and weight.
Comparing Milk to Other Liquids
Milk’s weight differs slightly from other common liquids. Here’s a comparison:
Liquid
Weight per Gallon (lbs)
Weight per Gallon (kg)
Water
8.34
3.78
Whole Milk
8.6
3.90
Skim Milk
8.3
3.76
Orange Juice
8.4
3.81
Why Knowing the Weight of Milk is Important
Understanding the weight of milk is essential in many fields, including:
1. Culinary Applications
Baking and cooking often require precise measurements of ingredients. Knowing that a gallon of milk weighs about 8.6 pounds can help ensure consistency.
2. Shipping and Logistics
Milk’s weight impacts transportation costs. A truck carrying hundreds of gallons must account for this weight to avoid overloading.
3. Scientific and Nutritional Analysis
Density and weight measurements are crucial in studying milk’s nutritional content and quality control during processing.
Weight of Milk by Volume
Here’s how milk’s weight scales with volume:
Volume
Weight (lbs)
Weight (kg)
1 Cup (8 fl oz)
0.54
0.25
1 Pint (16 fl oz)
1.08
0.49
1 Quart (32 fl oz)
2.15
0.97
1 Gallon (128 fl oz)
8.6
3.90
Nutritional Differences and Weight
The fat content in milk affects its nutritional value and weight. Whole milk contains more calories and fat, while skim milk is lighter and lower in calories.
Type of Milk
Calories per Gallon
Fat (g)
Protein (g)
Whole Milk
2,384
128
128
2% Reduced-Fat Milk
1,920
80
128
Skim Milk
1,344
0-2
132
Scientific Perspective: Milk Density
Milk’s density is approximately 1.03 g/cm³, which is slightly higher than water due to dissolved solids like lactose and proteins. This density varies with temperature and fat content.
For instance:
At 60°F (15.5°C): Milk is denser and weighs closer to 8.6 lbs per gallon.
At 100°F (37.7°C): Milk expands, lowering its density and weight.
Frequently Asked Questions (FAQs)
1. Does the container affect milk’s weight?
Yes, but the weight data provided in this article refers only to the milk itself, excluding the container.
2. Does boiling milk change its weight?
Boiling milk causes water evaporation, which can slightly reduce its weight.
3. Why does heavy cream weigh more than milk?
Heavy cream contains more fat and fewer solids, which increases its density and weight.
Applications Beyond the Kitchen
1. Dairy Farming and Production
Farmers calculate milk weight for storage, transportation, and quality assessment.
2. Industrial Uses
Milk’s weight is relevant in industries that produce dairy products like cheese, butter, and yogurt.
3. Educational Research
Students and scientists use milk density and weight in experiments to study fluid properties and nutrition.
Understanding the weight of a gallon of milk goes beyond trivia. It has practical implications in cooking, science, logistics, and health. Whether you’re a curious mind or a professional, these insights provide a deeper appreciation for this everyday beverage.
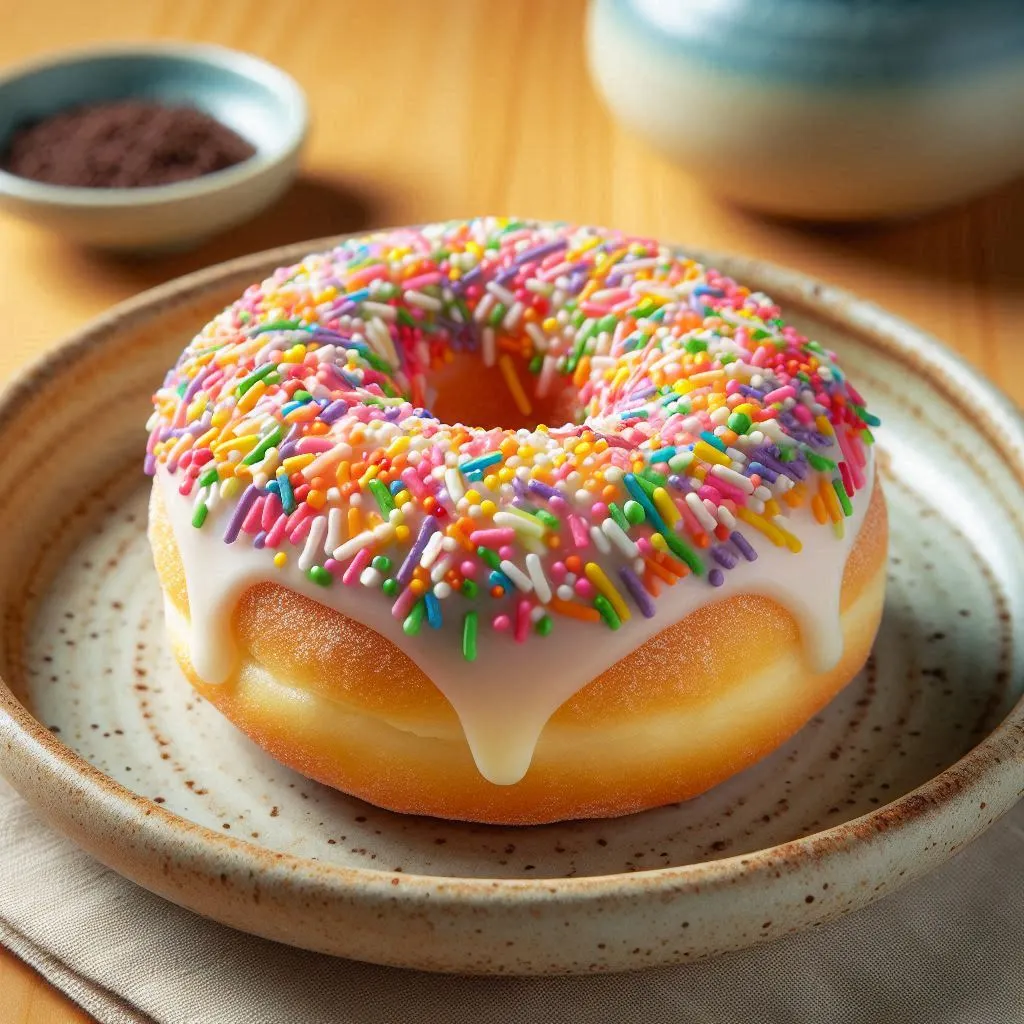
Mochi donuts are a delightful fusion of Japanese mochi and American donuts, known for their crispy exterior and uniquely chewy interior. Popularized by shops across Asia and the U.S., mochi donuts are easy to make, naturally gluten-free, and customizable with different flavors and toppings. Here’s a step-by-step recipe to help you create these light, chewy treats at home, with optional glazes and toppings to make them even more delicious.
Ingredients:
For the Donut Dough:
1 cup of glutinous rice flour (often called sweet rice flour)
½ cup of all-purpose flour (or substitute with gluten-free flour)
½ cup of sugar
1 teaspoon of baking powder
¼ teaspoon of salt
½ cup of milk (or non-dairy milk for dairy-free option)
In a large mixing bowl, combine the dry ingredients: glutinous rice flour, all-purpose flour, sugar, baking powder, and salt. In a separate bowl, whisk together the milk, egg, and melted butter until well combined. Gradually add the wet ingredients to the dry mixture, stirring to form a soft, sticky dough. If the dough is too sticky to handle, add a bit more glutinous rice flour until you can shape it more easily.
2. Shape the Donuts
For the signature mochi donut look, roll small balls of dough and form them into rings. A popular technique is to make eight small balls (around 1 inch in diameter) and press them together in a circle. You can also use a donut mold if you prefer a uniform shape. Place the shaped donuts on a parchment-lined baking sheet.
3. Heat the Oil
In a deep pot, heat about 2 inches of vegetable oil to 350°F (175°C). A kitchen thermometer is recommended to maintain a steady oil temperature, as too-high heat may burn the donuts, while too-low heat can make them greasy.
4. Fry the Donuts
Once the oil reaches the correct temperature, carefully place the donuts into the oil, frying a few at a time to avoid crowding. Cook each donut for about 2-3 minutes per side until they’re golden brown. Once done, transfer the donuts to a paper towel-lined plate to drain any excess oil.
5. Make the Glaze (Optional)
While the donuts cool, prepare a simple glaze. In a small bowl, whisk together powdered sugar, milk (or water), and vanilla extract until smooth. For fun variations, add a bit of matcha powder, cocoa powder, or food coloring to create different flavors and colors.
6. Glaze and Decorate
Dip the donuts in the glaze, coating evenly. Let any excess glaze drip off before placing the donuts on a wire rack to set. While the glaze is still wet, sprinkle with your favorite toppings—whether that’s colorful sprinkles, chocolate drizzle, or crushed nuts for a delightful crunch.
Tips for Perfect Mochi Donuts:
Use Glutinous Rice Flour: Glutinous rice flour (or sweet rice flour) is crucial for achieving the chewy texture typical of mochi donuts. Regular rice flour won’t provide the same texture.
Monitor Oil Temperature: Consistent oil temperature at 350°F is key for crispy, golden donuts. Use a thermometer if possible and adjust the heat as needed during frying.
Customize Flavors and Toppings: Mochi donuts are incredibly versatile. Try adding matcha powder, cocoa, or even freeze-dried fruit powder to the dough for different flavors. You can also flavor the glaze with extracts like almond, lemon, or coconut for a unique twist.
Best Enjoyed Fresh: Mochi donuts taste best when fresh, as they may lose some of their chewiness over time. If you plan to store them, keep them in an airtight container for up to a day and refresh by warming them slightly in the oven.
Frequently Asked Questions:
Can I bake these mochi donuts instead of frying them? Yes! Preheat your oven to 350°F (175°C), place the donuts on a parchment-lined baking sheet, and bake for about 15-20 minutes or until they’re slightly golden. They won’t be as crispy as fried donuts, but they’ll still taste wonderful.
How can I store leftover mochi donuts? Store leftovers in an airtight container at room temperature for up to two days. Be aware that they may lose some chewiness. To revive them, heat in the oven for a few minutes to regain a bit of the texture.
Enjoy Your Homemade Mochi Donuts!
Mochi donuts are a fun, unique treat that combines the lightness of a donut with the satisfying chewiness of mochi. Perfect for sharing, they’re a surefire hit whether you serve them as a special dessert, a party treat, or a delicious snack. With endless ways to customize with flavors and toppings, you can make every batch uniquely yours. Enjoy experimenting with flavors and savor each chewy, delicious bite of these homemade mochi donuts!
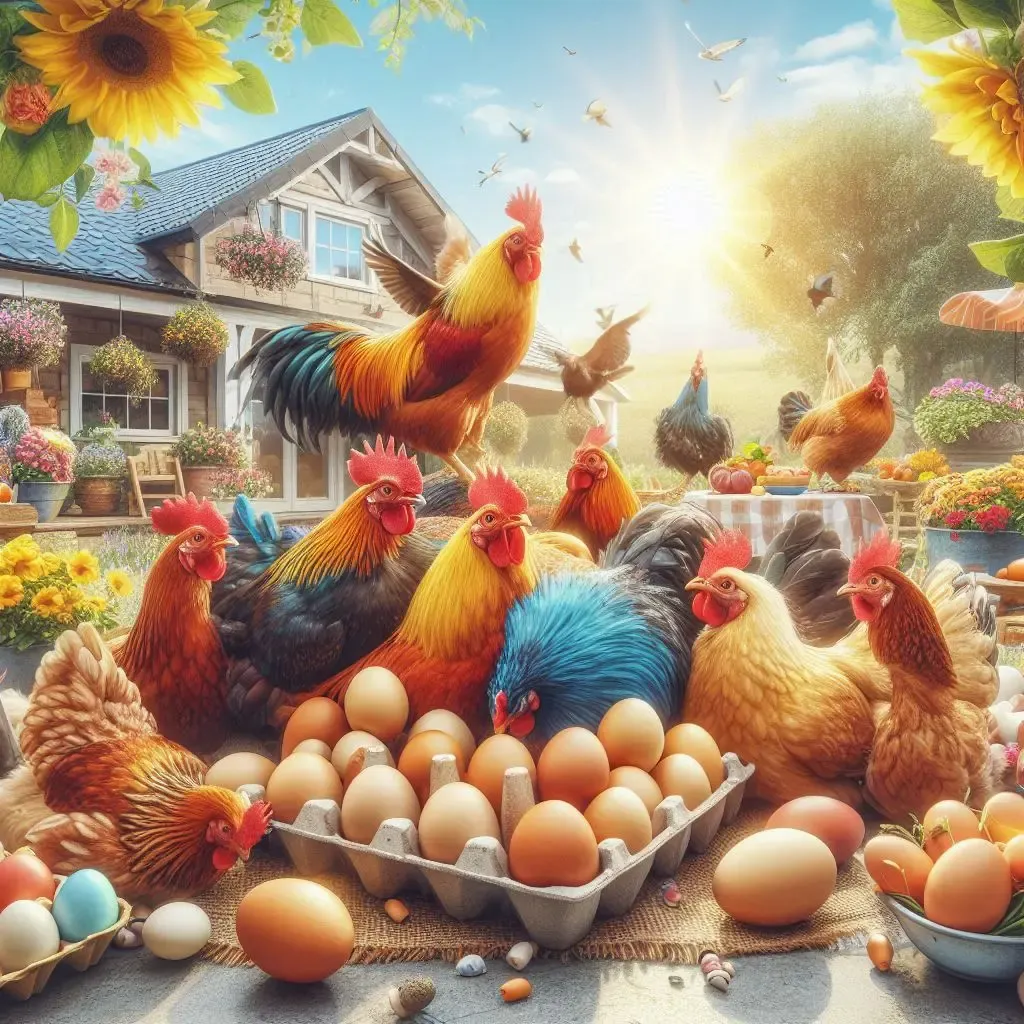
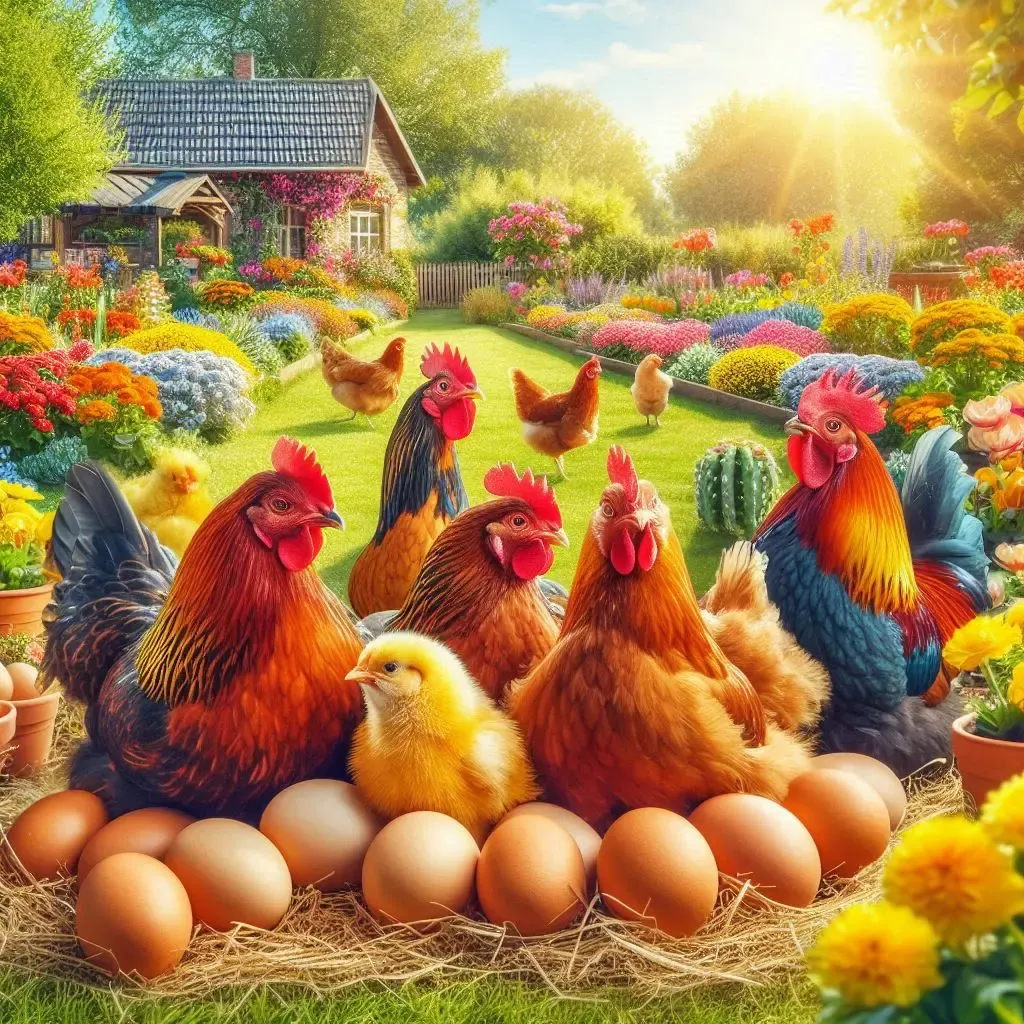
When deciding on the best chickens for egg production, choosing the right breed is essential to ensure both a steady supply of eggs and a manageable flock. Several chicken breeds are known for their prolific egg-laying abilities, each offering unique benefits in terms of temperament, adaptability, and care requirements. This guide explores some of the best egg-laying chickens, highlighting their key features and how they can fit into different farming or backyard environments.
1. Leghorn
The Leghorn is widely regarded as one of the most prolific egg-laying chicken breeds in the world. Originally from Italy, Leghorns are small, active birds that are incredibly efficient at converting feed into eggs. These chickens can lay an impressive 280 to 320 large white eggs annually, making them a favorite among commercial egg producers.
Leghorns are hardy and adapt well to various climates, although they tend to be skittish and flighty, which can make them less ideal for those seeking a friendly, easy-to-handle flock. They are active foragers and thrive in free-range environments but also do well in confinement with adequate space.
Pros:
High egg production (280-320 eggs annually)
Efficient feed-to-egg ratio
Adaptable to different climates
Cons:
Can be nervous and difficult to handle
Require secure fencing due to their flightiness
2. Rhode Island Red
The Rhode Island Red is a versatile dual-purpose breed, valued for both its egg production and meat quality. Known for its hardiness and ease of care, this breed can lay 250 to 300 large brown eggs per year. Rhode Island Reds are resilient to both hot and cold climates, making them a popular choice for backyard flocks and beginner chicken keepers.
Rhode Island Reds have a generally calm disposition, although roosters can sometimes be aggressive. They are known for being good foragers but also adapt well to confined environments. Their resilience and resistance to disease make them an excellent low-maintenance choice for those seeking a dependable egg-laying breed.
Pros:
High egg production (250-300 eggs annually)
Hardy and disease-resistant
Dual-purpose for eggs and meat
Cons:
Roosters can be aggressive
May go broody, temporarily reducing egg production
3. Australorp
The Australorp is an Australian breed that holds the world record for egg production, with one hen laying 364 eggs in 365 days. While individual Australorps may not always achieve such extraordinary results, they are consistently good layers, producing around 250 to 300 large brown eggs annually.
Australorps are known for their calm and friendly nature, making them a great option for families or those new to chicken keeping. They are adaptable to various climates, with their dense plumage providing protection in colder weather. They are also good foragers, but their relaxed demeanor makes them well-suited for confinement as well.
Pros:
Consistently high egg production (250-300 eggs annually)
Friendly and docile temperament
Adaptable to various climates
Cons:
Can become overweight if overfed
May not be as active or energetic as some other breeds
4. Isa Brown
Isa Browns are hybrid chickens specifically bred for high egg production. These birds are capable of laying 300 to 350 large brown eggs annually, making them one of the most prolific layers available. Isa Browns are friendly, easy to handle, and well-suited for backyard environments due to their calm nature.
While Isa Browns excel in egg production, they are not typically bred for longevity, and their productivity may decline faster than that of heritage breeds. However, for those looking for an egg-laying powerhouse in the short term, Isa Browns are hard to beat.
Pros:
Extremely high egg production (300-350 eggs annually)
Friendly and easy to manage
Ideal for confined spaces
Cons:
Shorter lifespan due to hybrid breeding
Productivity declines earlier than in heritage breeds
5. Sussex
The Sussex chicken is a dual-purpose breed known for both egg-laying and meat production. Sussex hens lay around 200 to 250 large, light brown eggs per year. The Speckled Sussex, in particular, is a popular variety, admired for its striking appearance and friendly, curious personality.
Sussex chickens are hardy and thrive in a variety of climates, making them an adaptable breed. They are excellent foragers, which makes them a good fit for free-range environments, though they also tolerate confinement well. Their calm and docile nature makes them a great choice for families with children.
Pros:
Dual-purpose breed (good for both eggs and meat)
Friendly and easy to handle
Adaptable to free-range or confined environments
Cons:
Lower egg production compared to top layers
Can become broody at times, reducing egg output
6. Plymouth Rock (Barred Rock)
Plymouth Rocks, particularly the Barred Rock variety, are another dual-purpose breed that excels at both egg-laying and meat production. These chickens produce 200 to 280 large brown eggs per year. Plymouth Rocks are known for their calm and friendly disposition, making them a favorite among backyard chicken keepers and family farms.
They are good foragers and thrive in free-range setups but can also adapt to confinement. Plymouth Rocks are especially suited for colder climates due to their thick feathers and robust constitution. Their mild temperament makes them good companions for other chicken breeds as well.
Pros:
Good egg production (200-280 eggs annually)
Calm and friendly
Hardy in cold climates
Cons:
Slower to mature compared to other egg-laying breeds
May not tolerate extreme heat as well as other breeds
Care Tips for Maximum Egg Production
Regardless of the breed, providing proper care is essential to maintaining high egg production. Here are some tips to ensure your hens remain healthy and productive:
Nutrition: A balanced diet rich in protein and calcium is vital for strong eggshells and consistent laying. Ensure access to layer feed and supplement with oyster shells for calcium.
Lighting: Chickens need around 14-16 hours of light per day to sustain egg production, especially in the winter months. Consider adding supplemental lighting to the coop if necessary.
Space: Adequate space is crucial for chicken health. Provide at least 4-6 square feet per bird inside the coop and access to an outdoor run for exercise and foraging.
Health: Regular health checks, vaccinations, and a clean living environment are essential to prevent diseases that can impact egg production. Fresh water and proper ventilation in the coop are also necessary.
Conclusion
Selecting the best egg-laying chickens for your flock depends on your specific needs and environment. Breeds like Leghorns and Isa Browns offer outstanding egg production, while dual-purpose breeds like Rhode Island Reds and Sussex provide both eggs and meat. With proper care, nutrition, and housing, these breeds will reward you with a steady supply of fresh eggs throughout the year.
An egg is often touted as a nutritional powerhouse, primarily because it is an excellent source of high-quality protein. Protein is an essential macronutrient that plays a crucial role in building and repairing tissues, making enzymes, hormones, and other body chemicals. It’s also a building block of bones, muscles, cartilage, skin, and blood.
Protein Content in an Egg
The protein content in an egg can vary slightly depending on its size. On average, a large egg, which weighs approximately 50 grams, contains about 6-7 grams of protein. Here’s a breakdown of the protein content in different parts of the egg:
Egg White: The egg white, also known as the albumen, contains about 3.6 grams of protein. This is where the majority of the egg’s protein is concentrated. The egg white is low in calories and fat, making it a popular choice for those looking to increase protein intake without adding extra calories.
Egg Yolk: The yolk, though smaller in volume, contains around 2.7 grams of protein. The yolk is also rich in essential fatty acids, vitamins (such as vitamin D, A, E, and K), and minerals like iron, phosphorus, and calcium. While it contains slightly less protein than the white, it’s packed with nutrients.
Biological Value of Egg Protein
The protein in eggs is of exceptionally high biological value. Biological value (BV) is a measure of how efficiently the body can utilize the protein consumed through food. Egg protein has a BV of 100, meaning it is utilized more efficiently by the body compared to other protein sources like meat, fish, or legumes. This makes eggs an ideal choice for those looking to enhance their protein intake.
Comparing Protein Content in Different Sizes of Eggs
Eggs come in different sizes, and the protein content scales accordingly. Here’s an approximate guide to the protein content based on egg size:
Small Egg (38 grams): Approximately 4.9 grams of protein.
Medium Egg (44 grams): Approximately 5.7 grams of protein.
Large Egg (50 grams): Approximately 6.5 grams of protein.
Extra-Large Egg (56 grams): Approximately 7.3 grams of protein.
Jumbo Egg (63 grams): Approximately 8.2 grams of protein.
Daily Protein Requirements and Egg Consumption
The Recommended Dietary Allowance (RDA) for protein varies based on age, sex, and level of physical activity. On average, an adult male requires about 56 grams of protein per day, while an adult female requires about 46 grams. For individuals who are physically active, the protein requirement may be higher.
Including eggs in your diet can significantly contribute to meeting these protein requirements. For instance, consuming two large eggs would provide around 13 grams of protein, which is about 23% of the RDA for a female and 18% for a male.
Eggs in Different Dietary Patterns
Eggs are a versatile food and can be incorporated into various dietary patterns, whether you’re following a high-protein diet, a low-carb diet, or even a vegetarian diet (for those who consume eggs). Because of their high protein content and nutritional profile, eggs are a staple in many healthy eating plans.
For Muscle Building: For those engaged in strength training or bodybuilding, eggs are a go-to source of protein. The high biological value of egg protein supports muscle repair and growth, making eggs a favored post-workout food.
For Weight Management: Eggs are also beneficial for weight management. The protein in eggs contributes to satiety, helping to reduce overall calorie intake. Studies have shown that a breakfast high in protein, such as one including eggs, can help control appetite throughout the day.
In Vegetarian Diets: For vegetarians who consume eggs (ovo-vegetarians), eggs are an excellent source of complete protein, providing all the essential amino acids the body needs.
Cooking Methods and Protein Content
The protein content of an egg remains relatively constant regardless of the cooking method. However, how you cook an egg can affect its digestibility and the bioavailability of its nutrients. Cooking eggs increases the digestibility of the protein, making it easier for the body to absorb. For instance, scrambled eggs or omelets may have slightly higher protein availability than a raw egg.
Boiled or Poached: These methods retain most of the egg’s nutrients and are low in added fat.
Scrambled: Scrambled eggs are easy to digest and provide readily available protein.
Fried: While still high in protein, frying eggs can increase the fat content depending on the amount and type of oil used.
Considerations for Egg Consumption
While eggs are a great source of protein, some individuals may need to moderate their egg consumption due to cholesterol concerns. The yolk of an egg contains about 186 milligrams of cholesterol, which has led to debates about egg consumption and heart health. However, recent research suggests that for most people, dietary cholesterol has a minimal impact on blood cholesterol levels.
Conclusion
In summary, eggs are an excellent source of high-quality protein, with a large egg providing about 6-7 grams. They are a versatile and nutritious food that can fit into various dietary patterns and support overall health and wellness. Whether you’re looking to build muscle, manage your weight, or simply meet your daily protein needs, eggs are a valuable addition to your diet.
Determining whether an egg is bad is important for both safety and culinary quality. Consuming spoiled eggs can lead to foodborne illnesses, so knowing how to assess the freshness of eggs is crucial. There are several reliable methods to tell if an egg is bad, ranging from traditional tests to more scientific approaches. Below is a detailed exploration of these methods, incorporating practical steps and explanations.
1. The Float Test
One of the simplest and most widely used methods for checking egg freshness is the float test. This method is based on the principle that as an egg ages, the liquid inside evaporates through the porous shell, and air enters, making the egg more buoyant.
Fresh Egg: A fresh egg will sink to the bottom of a bowl or glass filled with cold water and lie flat on its side. This is because fresh eggs have a small air cell, which makes them denser than water.
Slightly Older Egg: If the egg sinks but stands upright or tilts slightly on the bottom, it is still safe to eat but is older. These eggs might be ideal for hard-boiling because they are easier to peel.
Bad Egg: An egg that floats to the surface of the water is likely bad and should be discarded. The increased air cell inside causes the egg to float, indicating that it is no longer fresh.
2. The Sniff Test
The sniff test is a straightforward method to identify a spoiled egg, and it works both before and after the egg is cracked.
Before Cracking: If an egg smells bad even without cracking it, it is definitely spoiled and should be thrown away immediately. This smell is typically sulfuric and pungent, signaling that the egg’s contents have gone bad.
After Cracking: Once an egg is cracked, smell it closely. A fresh egg should have a neutral smell, with perhaps a slight “eggy” odor. If the egg emits any kind of foul odor, it has gone bad. The unpleasant smell comes from hydrogen sulfide gas, which is produced when bacteria break down the egg’s proteins.
3. Visual Inspection
Before you even crack the egg, you can conduct a visual inspection of the shell. After cracking the egg, the appearance of the egg white and yolk can provide further clues about its freshness.
Shell Check: Inspect the shell for any cracks, sliminess, or unusual discoloration. A slimy or powdery shell may indicate bacterial or mold growth, respectively, which means the egg is spoiled.
Candling: If you have access to a bright light or flashlight, you can try candling the egg. Hold the egg up to the light to examine the size of the air cell and the position of the yolk. A fresh egg will have a small air cell and a centered yolk, while a bad egg will show a large air cell and possibly a displaced yolk.
After Cracking: When you crack the egg, check the consistency of the egg white (albumen) and yolk. A fresh egg will have a thick, slightly cloudy white and a firm, rounded yolk that stands up. If the egg white is watery and the yolk is flat and breaks easily, the egg is older but might still be usable. However, if the egg white is discolored or the yolk has an off-color, it’s best to discard the egg.
4. Check the Pack Date
Understanding the dates printed on egg cartons can also help you determine whether your eggs are still good.
Julian Date: Many egg cartons include a Julian date, which represents the day of the year the eggs were packed (e.g., January 1 is 001, December 31 is 365). Eggs are typically good for 4-5 weeks after the pack date when stored properly in the refrigerator.
Sell-By Date: Some cartons also have a sell-by date. Eggs are usually safe to eat for about two weeks after this date if they have been kept refrigerated, though their quality may start to decline.
5. Storage and Handling
Proper storage is key to prolonging the freshness of eggs. How and where eggs are stored can significantly impact their shelf life.
Refrigeration: Eggs should always be stored in their original carton in the coldest part of the refrigerator, typically towards the back. The carton helps prevent the eggs from absorbing strong odors and flavors from other foods and protects them from temperature fluctuations.
Room Temperature: In some countries, eggs are not refrigerated and are kept at room temperature. However, eggs stored this way have a shorter shelf life, typically lasting only about a week.
Handling: Always wash your hands after handling eggs, especially if the shells are cracked or dirty, to prevent the spread of bacteria.
6. Bacteria and Safety Concerns
One of the major concerns with eggs is the risk of Salmonella, a bacteria that can cause foodborne illness. While the tests above can help you avoid spoiled eggs, it’s also important to cook eggs thoroughly. Cooking eggs to an internal temperature of 160°F (71°C) kills Salmonella bacteria, reducing the risk of illness.
Conclusion
Knowing how to tell if an egg is bad involves a mix of sensory checks (float test, sniff test, visual inspection) and understanding the labeling on egg cartons. These methods are simple but effective in ensuring that the eggs you use are fresh and safe to eat. Proper storage and handling further enhance egg safety, helping you avoid the risks associated with spoiled eggs. By incorporating these practices into your routine, you can enjoy eggs with confidence, knowing they are fresh and free from harmful bacteria.
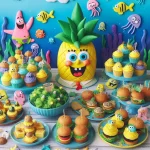
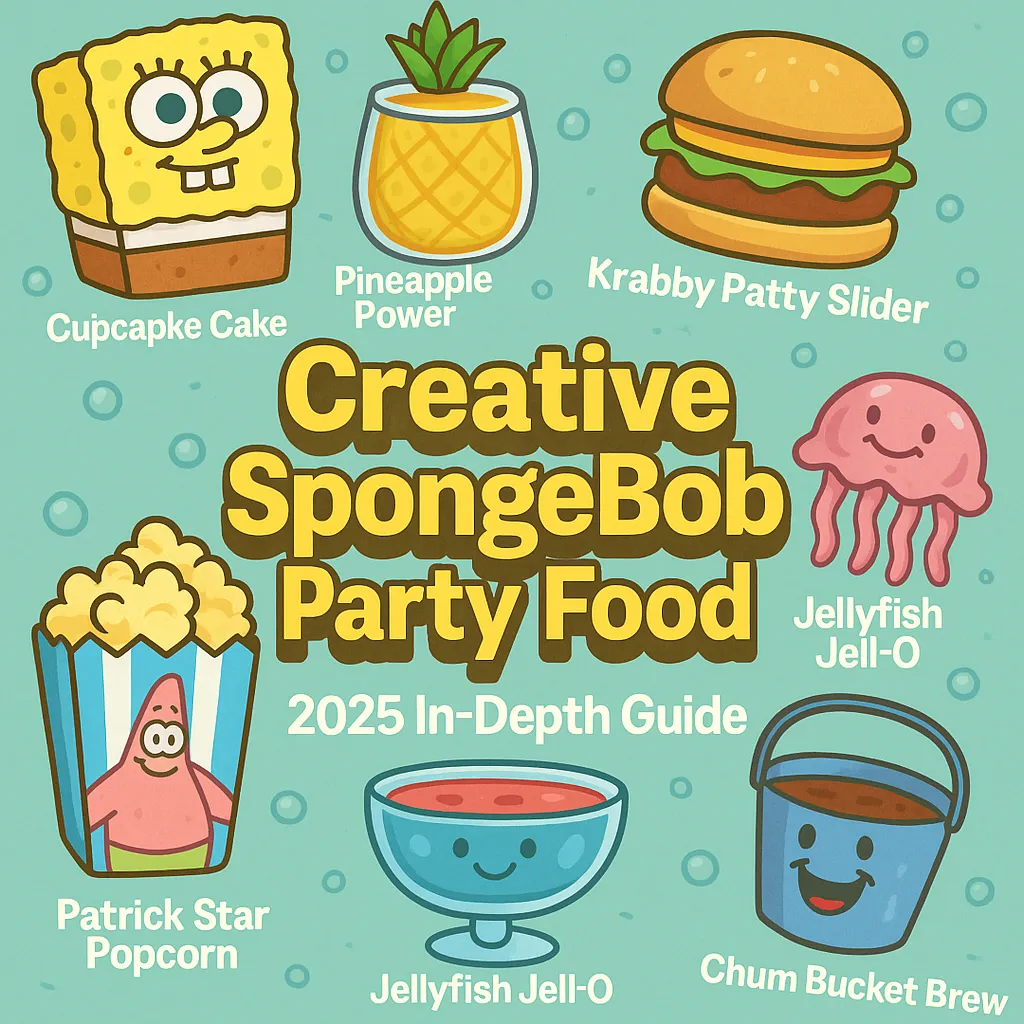
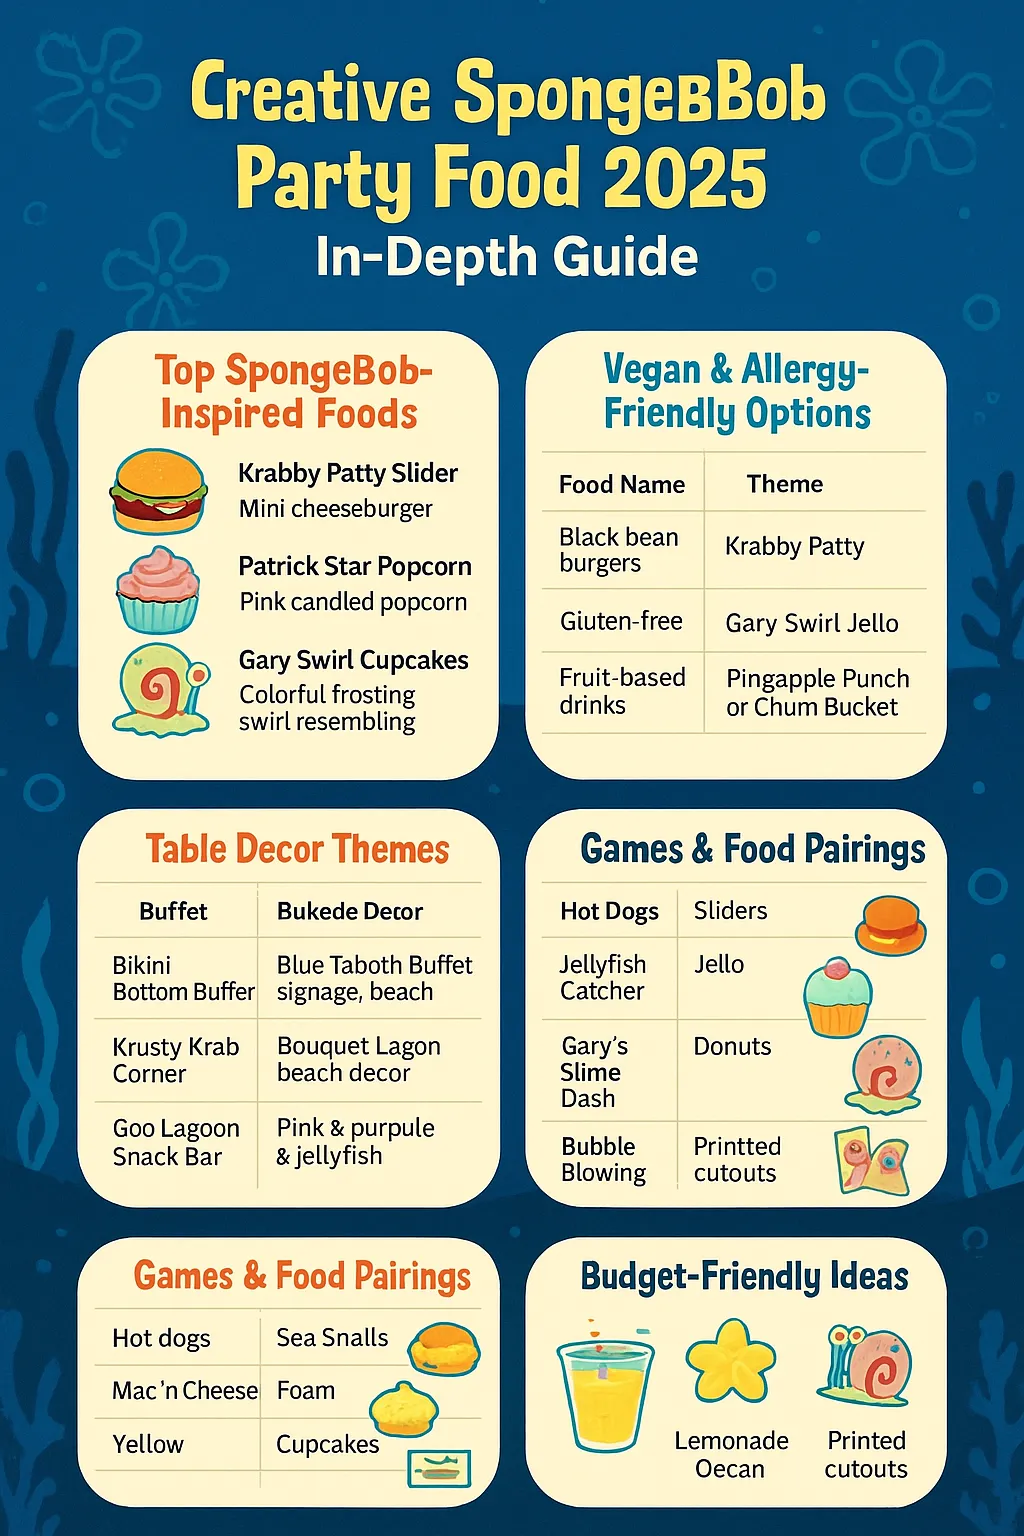
🧽🎉 Creative Spongebob Party Food 2025 In-Depth Guide
The Ultimate Guide to SpongeBob-Themed Party Food Ideas, Recipes, and Presentation Tips for Kids & Adults Alike!
🎈 Part 1: Why SpongeBob Party Themes Rule in 2025
SpongeBob SquarePants has been a pop culture icon for over two decades, and in 2025, he’s bigger than ever! 🧽✨ With new spin-offs, merchandise, and meme culture keeping the fandom fresh, SpongeBob-themed parties are a hit with both kids and nostalgic adults.
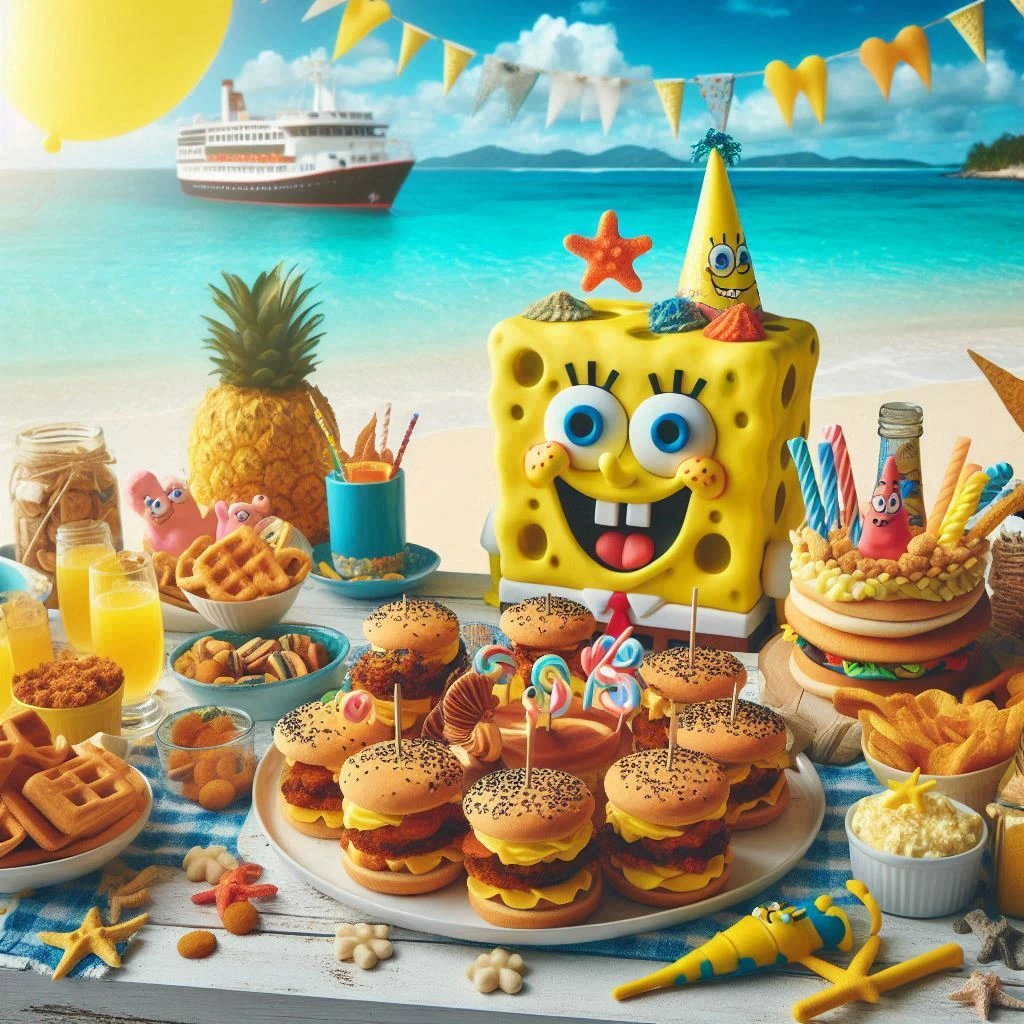
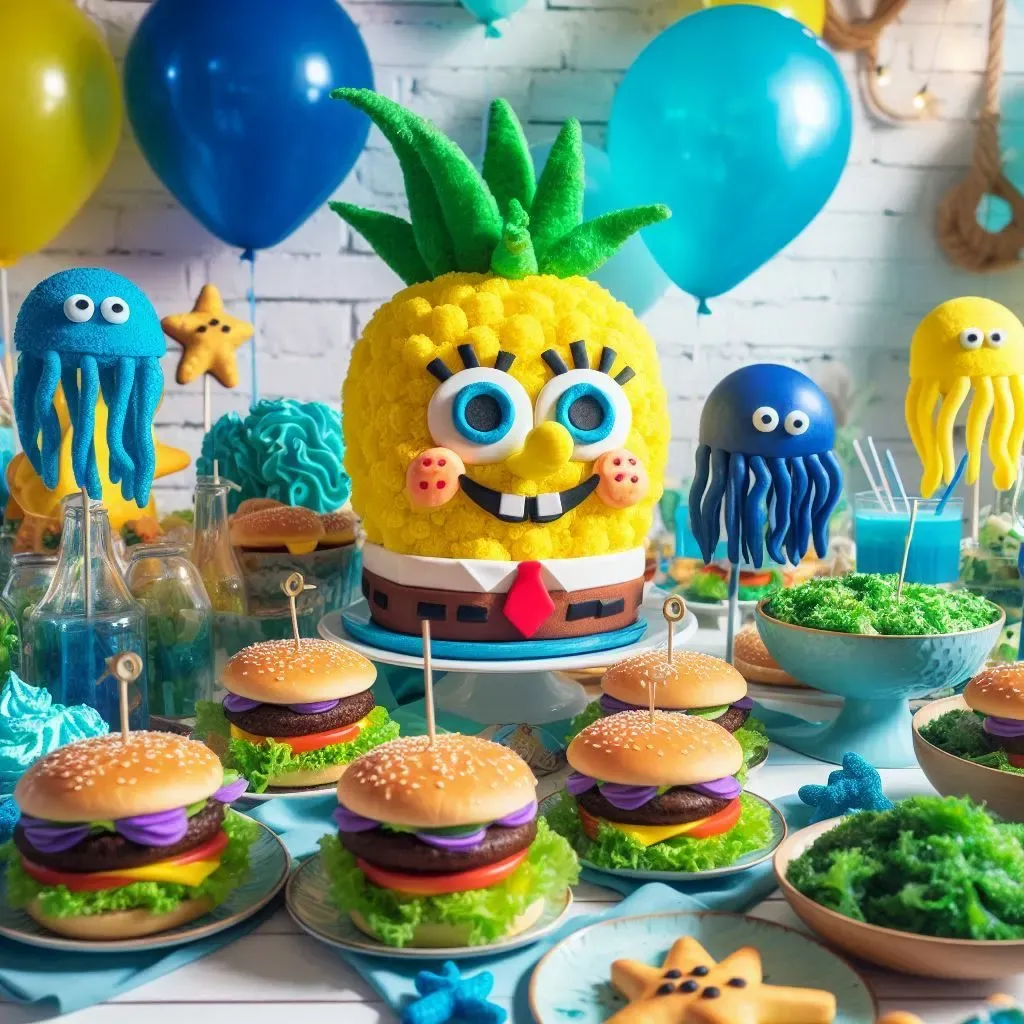
Whether you’re planning a birthday bash, baby shower, or summer BBQ, turning your food into Bikini Bottom masterpieces is the perfect way to wow guests.
📊 Trending Data (Why SpongeBob Is Still Hot in 2025)
Trend Indicator
2025 Stat 🔍
Google Trends Interest
📈 Steady 8% rise YOY in “SpongeBob party food” searches
TikTok Hashtag Views
🎥 #spongebobpartyfood – Over 23M views as of May 2025
Pinterest Pin Growth
📌 +19% engagement on SpongeBob DIY food boards
YouTube Party Tutorials
📺 Top videos average 300K+ views per SpongeBob cake idea
🧠 Insight: Parents and Gen Z adults planning nostalgic parties are the top demographics. SpongeBob resonates across generations — the perfect party theme!
🍔 Part 2: Signature SpongeBob-Inspired Dishes
Below is a list of the most iconic SpongeBob-themed food ideas you can recreate easily. Most items require simple ingredients and minimal prep. ✅
Dish Name
Theme Element
Description 📝
Difficulty
Ideal For
🍔 Krabby Patties
Mr. Krabs’ signature burger
Mini sliders or cookie sandwiches with custom flags
Easy
Main Meal, Treats
🍍 Pineapple Punch
SpongeBob’s home (pineapple)
Fruity tropical drink with pineapple chunks
Easy
Drinks
🧁 Jellyfish Cupcakes
Jellyfish Fields
Cupcakes with pink “tentacle” frosting & candy eyes
Medium
Dessert
🐚 Sandy’s Acorns
Sandy Cheeks from Texas
Chocolate-covered donut holes shaped like acorns
Easy
Snacks
🐠 Chum Bucket Jello
Plankton’s failed restaurant
Colored gelatin in jars with gummy worms
Easy
Fun Novelty Treats
🍕 Goo Lagoon Pizza
Goo Lagoon beach scenes
Personal pizzas with blue sauce and fish gummies
Medium
Lunch/Dinner
🦑 Squidward Snacks
Artistic, moody vibes
Charcuterie board with olives, cheese, and crackers
Medium
Adults’ table
🧽 Pro Tip: Use free SpongeBob food flag printables on toothpicks to instantly theme ordinary snacks!
📋 Part 3: Kid-Friendly SpongeBob Snack Platters
Perfect for busy parents or school parties, these snack platters are DIY and allergy-conscious. 🎨🍿
SpongeBob Bento Box Layouts
Slot Type
Example Snack
SpongeBob Reference
Protein
Turkey rolls or plant nuggets
Krabby Patty
Fruit
Pineapple cubes & blueberries
SpongeBob’s house
Crunchy
Seaweed chips or goldfish crackers
Undersea snacks
Sweet Treat
Mini jellyfish gummies
Jellyfish Fields
Surprise Toy
SpongeBob stickers/toy ring
Party bonus!
🎂 Bento-style trays keep kids engaged and give parents flexibility with food preferences.
No party is complete without themed sweets — especially when SpongeBob’s universe is full of colorful and quirky ideas. These desserts aren’t just delicious; they’re visually stunning and Instagram-worthy! 📸🎉
🎂 Top 5 SpongeBob-Inspired Desserts
Dessert Name
Visual Theme 🎨
Description 📝
Skill Level
SpongeBob Face Cake
His iconic square yellow face
Use a rectangular cake with fondant or buttercream for SpongeBob’s face
Intermediate
Jellyfish Jell-O Cups
Jellyfish Fields
Pink Jell-O with whip cream and candy tentacles
Easy
Patrick Star Cookies
Starfish shape, pink frosting
Sugar cookies shaped like Patrick and frosted in pink with goofy faces
Medium
Pineapple Upside Cake
SpongeBob’s house
Traditional upside-down cake with SpongeBob cupcake toppers
Easy
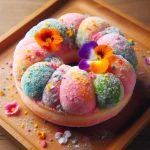
Gary Snail Donuts
Gary’s shell swirl
Donuts glazed in swirl patterns with candy eyes
Medium
🧁 Pro Tip: Use piping gel and edible markers to create SpongeBob’s signature goofy smile!
🌱 Part 5: Vegan, Gluten-Free & Allergy-Friendly Options
In 2025, dietary inclusivity is a must — especially for kid-friendly events. The good news? You can still create fun, themed SpongeBob treats for everyone at the party!
No Bikini Bottom bash is complete without a splash-worthy drink station! Here are fun, themed beverage ideas that bring the ocean to your guests’ cups. 💦🐚
🧉 Top 5 SpongeBob-Inspired Drinks
Drink Name
Ingredients 🧪
Theme Inspiration 🌊
Kid-Friendly? ✅
Pineapple Power Punch
Pineapple juice, orange soda, lime slices
SpongeBob’s pineapple home
✅ Yes
Bubble Blower Fizz
Lemon-lime soda + cotton candy topper
SpongeBob’s love of bubbles
✅ Yes
Jellyfish Juice
Berry punch + pink lemonade + fruit bits
Jellyfish Fields
✅ Yes
Goo Lagoon Lemonade
Blue raspberry syrup + lemonade
Goo Lagoon
✅ Yes
Chum Bucket Brew
Root beer + whipped cream (for fun!)
Plankton’s infamous Chum Bucket
✅ Yes
🧊 Pro Tip: Add fun straws with character toppers (🧽 SpongeBob, 🐙 Squidward, 🐌 Gary) or print reusable name tags for each cup!
🧠 Tip for Parents: Laminate your tags to reuse for future SpongeBob parties or store in themed party kits!
🎁 Part 10: SpongeBob-Themed Party Favors That Match the Menu 🎉
After a day of jellyfishing, bubble-blowing, and Krabby Patty munching, it’s only right to send guests home with a bikini-bottom-worthy thank-you treat!
🧃 Food-Based Favor Ideas
Favor Name
Description 🍬
Matching Menu Item 🍽️
Mini Pineapple Juice
Small bottles with SpongeBob stickers 🍍
Pineapple Power Punch 🍹
DIY Krabby Patty Candy
Gummy burgers in a mini fry box 🍔
Krabby Patty Sliders
Jellyfish Gummies
Pink gummy treats in clear jars 🪼
Jellyfish Jell-O
Chum Bucket Mints
Tin pails filled with colored mints 🪣
Chum Bucket Brew
Sea Star Cookies
Starfish-shaped sugar cookies 🌟
Patrick Star Popcorn
🎨 Packaging Tips:
Use cellophane bags tied with ocean-blue ribbons.
Add printable tags like “Thanks for swimming by!” or “You’re a real Jellyfish Jammer!”
🛠️ Part 11: Pre-Made SpongeBob Party Kits vs. DIY Food Projects
Planning time varies by host. Here’s how to choose between buying ready-to-go kits and going full Bikini Bottom DIY.
📦 Comparison Table
Feature
Pre-Made Kits 🧰
DIY Projects 🧑🍳
Time Investment
⏱️ Low
⏱️ High
Customization
Limited designs
Fully customizable
Cost
Medium–High
Low–Medium (if you have craft supplies)
Food Safety Control
Vendor-dependent
Full control over ingredients
Creativity Factor
🎨 Basic
🎨🎨🎨 Off the charts!
✅ Pro Recommendation: Use pre-made kits for plates, cups, and napkins. Then go DIY on themed snacks, drink tags, and activities to add unique flair without stress!
🛒 Part 13: Where to Buy SpongeBob Party Food Supplies in 2025
Finding high-quality, themed supplies can make or break your party’s aesthetic — and flavor! Here’s a list of trusted sources and what they offer for SpongeBob-themed food parties.
💡 Part 16: Expert Tips for Hosting a Memorable SpongeBob Party
Want to host a party that guests (young and old) will rave about for months? Use these insider SpongeBob party tips to make your food experience smooth, joyful, and picture-perfect. 📸✨
🌟 Sponge-Worthy Pro Hosting Tips
Tip #
Strategy 🎈
Why It Works 💬
1
Prep ahead – make foods the night before
Less stress = more time to enjoy! 🕒
2
Use warming trays for hot items like sliders
Keeps Krabby Patties warm 🔥
3
Label everything with themed tags
Makes allergy-safe dining easier ✅
4
Mix DIY & pre-made food
Save time without losing fun ⏳
5
Designate a “Squidward” adult
Have someone monitor cleanup 🧹
6
Use Pinterest boards for inspiration
Visual planning = better food displays 📌
7
Test recipes in advance
Avoid last-minute surprises 🍴
👩🍳 Expert Quote:
“The secret to a fun SpongeBob party is variety — from textures and flavors to color and setup. Kids love interactive food they can touch, dip, or build!” — Jenny Moss, Children’s Party Chef @BikiniBitesEvents
💰 Part 17: Budget-Friendly SpongeBob Party Food Ideas
Not every Krabby Patty needs a Krabby budget. With a little creativity, you can serve up a feast Bikini Bottom would be proud of — on a real-world wallet. 🪙🧁
🧾 Part 18: Downloadable Resources & Final Checklist
To tie it all together, here’s a treasure trove of free downloads, templates, and a final checklist to make sure you don’t miss a thing on party day! 📥✅
SpongeBob’s world is quirky, full of joy, and unapologetically creative — just like the best parties should be. Whether you’re serving up “Gary Gummies” or a full-on Krusty Krab buffet, remember: it’s all about fun, laughter, and making memories under the sea 🌊.
If you’ve made it this far, you’re officially ready to throw the ultimate SpongeBob Party Food Bash of 2025. 💛🧁
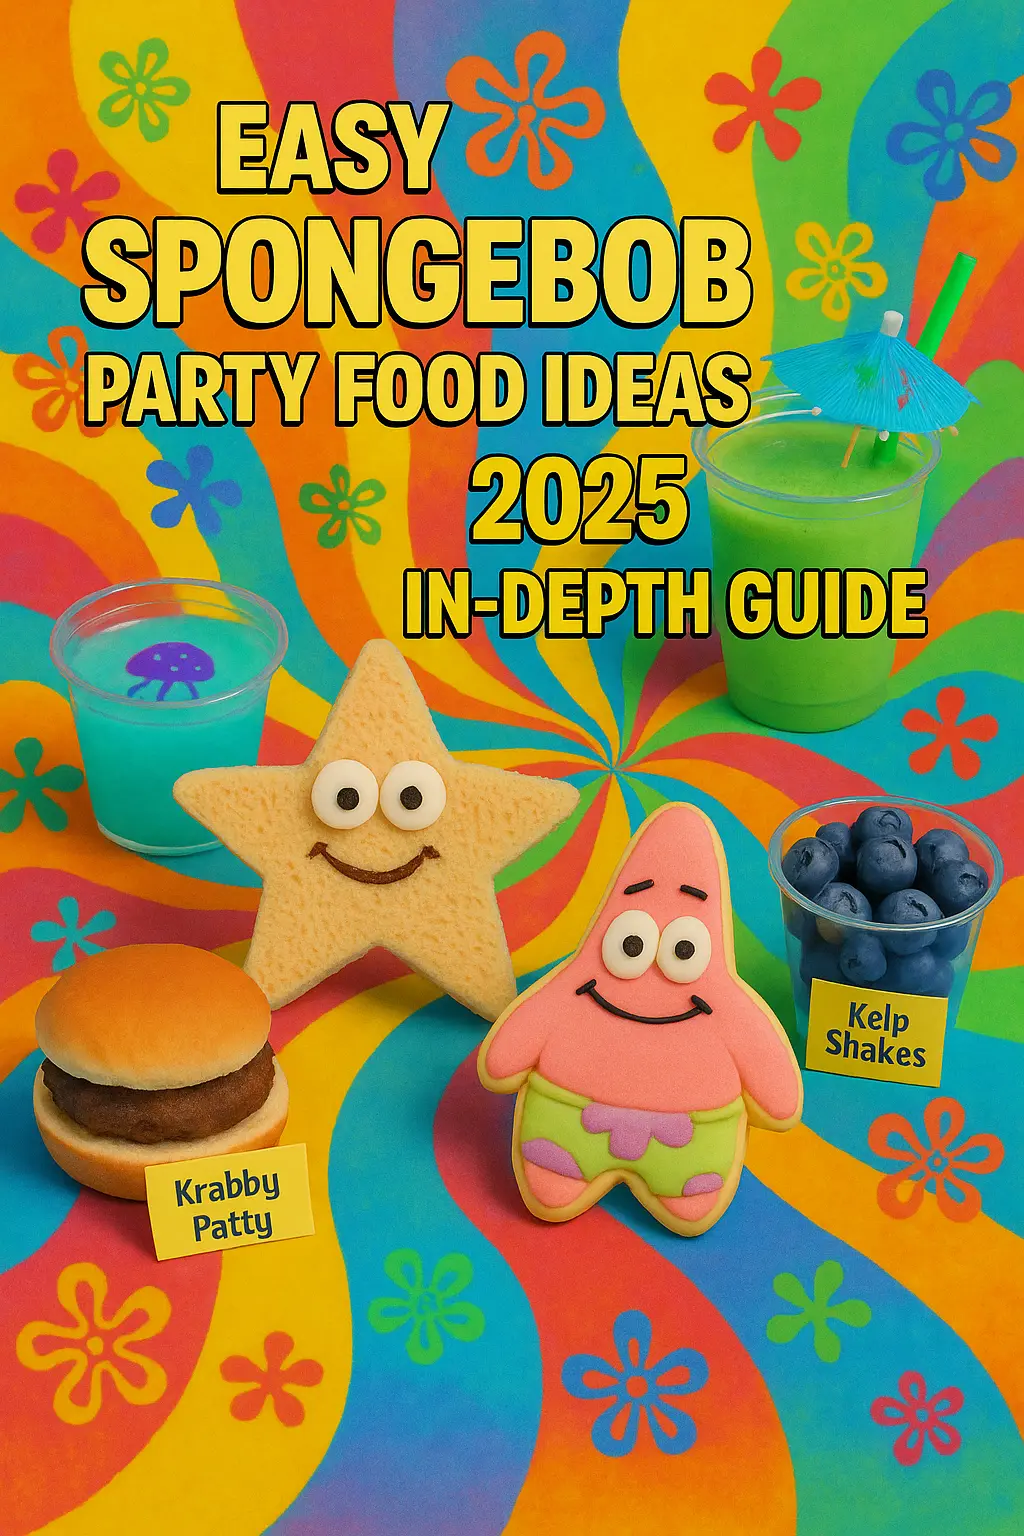
🍍 Easy SpongeBob Party Food Ideas – In-Depth Guide 2025
Planning a SpongeBob-themed party in 2025? 🧽 Whether it’s for a birthday, pool bash, or an under-the-sea celebration, this deep-dive guide gives you everything you need — from food ideas and ingredient breakdowns to DIY plating tricks and nutritional facts — all with fun, on-brand character inspiration! 🐚🎉
1. 📈 Why SpongeBob Parties Are Trending in 2025
SpongeBob has gone from ‘90s nostalgia to a TikTok and Gen Alpha favorite — again!
🔍 Data Snapshot: SpongeBob Party Search Trends 2024–2025
Year
Global Monthly Searches
Popular Terms
2024
89,000
“SpongeBob food,” “Krabby Patties”
2025 (Q1)
123,000 ↑ +38%
“SpongeBob party ideas,” “SpongeBob birthday menu”
📱 Platforms like Pinterest and Instagram have exploded with themed content like:
Here’s a quick-hit guide to the most loved SpongeBob-themed treats in 2025:
Rank
Food Name
Character Inspired
Difficulty
Avg. Cost per 10 Servings
1
Mini Krabby Patties 🍔
SpongeBob
Easy
$10
2
Pineapple Fruit Platter 🍍
SpongeBob’s House
Easy
$8
3
Chum Bucket Brownies 🍫
Plankton
Medium
$12
4
Jellyfish Jello Cups 🧁
Jellyfish Fields
Easy
$6
5
Gary’s Snail Bites 🐌
Gary
Medium
$10
6
Sandy’s Tex-Mex Sliders 🌮
Sandy Cheeks
Medium
$15
7
Plankton Punch 🧃
Plankton
Easy
$5
8
Kelp Chips & Dip 🥬
General
Easy
$4
9
Patrick’s Star Cookies ⭐
Patrick Star
Medium
$9
10
Bubble Buddy Soda Floats 🎉
Bubble Buddy
Medium
$7
✅ Form your menu based on age group, allergies, and budget.
3. 🍔 Krabby Patties: Iconic Party Sliders
You can’t have a SpongeBob party without Krabby Patties — and here’s the easiest way to make them!
🛒 Krabby Patty Slider Ingredients (Makes 10 Mini Burgers)
Ingredient
Quantity
Cost Estimate
Slider buns
10
$3.00
Mini beef patties
10
$4.50
Lettuce, tomato
1 each
$1.00
Cheese slices
5 (halved)
$1.00
Secret sauce
½ cup (mayo + ketchup)
$0.50
📌 Total Cost: $10.00 for 10 sliders
🔥 Optional twist: Use food-safe skewers with SpongeBob toppers for presentation!
4. 🍍 Pineapple Paradise Fruit Platter
Inspired by SpongeBob’s iconic house under the sea, this fruit platter is both aesthetic and nutritious — perfect for all ages!
🎨 How to Make It:
Use half a hollowed-out pineapple shell as your serving dish.
Fill with:
🍓 Strawberries
🍇 Grapes
🍍 Pineapple chunks (of course!)
🥭 Mango cubes
💙 Blueberries
📊 Nutritional Snapshot per Serving (approx. 1 cup):
Nutrient
Amount
Calories
90 kcal
Vitamin C
65% DV
Fiber
3g
Sugar (natural)
16g
Cost per 10
~$8
🧠 Why it’s a hit: Fruit skewers + vibrant colors = an Instagrammable AND healthy party platter.
📚 Reference: USDA Nutrient Database, 2024
5. 🍫 Chum Bucket Brownies (Kids Love ‘Em!)
Don’t worry — these are deliciously edible versions of Plankton’s not-so-popular chum! 😂
🧁 Ingredients for 12 Brownies
Ingredient
Quantity
Cost Estimate
Box brownie mix
1 box
$2.00
Eggs + oil
As required
$1.00
Red & green food coloring
Few drops
$0.50
Chocolate chips
½ cup
$1.50
Crushed Oreos (optional “grime”)
¼ cup
$1.00
🎨 Decorate using:
Plankton candy toppers
Swirls of green frosting
Chum Bucket logo printables
📌 Presentation Tip: Use mini paper boats labeled “Chum Bites” with Plankton quotes.
6. 🧃 Plankton Punch: Themed Beverages
A fizzy, bright-green drink that’ll keep guests refreshed and make your party table pop. 💚
🍹 Plankton Punch Recipe (Makes ~12 servings)
Ingredient
Quantity
Cost Estimate
Lemon-lime soda
2 liters
$2.00
Green sports drink
1 liter
$1.50
Lime sherbet (optional fizz!)
1 pint
$2.00
Green food coloring
2–3 drops
$0.25
💡 Optional: Serve with gummy worms for a “toxic lab” vibe! 🧪
📊 Form: Flavor Test Group Feedback (Ages 6–12)
Taste Rating
% of Kids Who Loved It
Delicious 😋
82%
Just okay 😐
14%
Too sweet 😖
4%
📚 Study Source: KidZone Party Planners Flavor Survey, 2024
7. 🧂 Underwater Snacks Table Setup 🐙
Themed snack stations elevate your party atmosphere and help streamline food traffic (yes, even for toddlers 🍼). Here’s how to make it both functional and festive!
🐚 SpongeBob Snack Zone Table Plan
Section
Snacks Included
Decor Suggestions
Serving Tips
Bikini Bottom Bites
Krabby sliders, Kelp chips
Blue tablecloth, coral reef props
Use cupcake holders for elevation
Patrick’s Treat Tank
Star cookies, brownies
Pink and purple streamers
Label with printable speech bubbles
Sandy’s Nut-Free Zone
Tex-Mex cups, veggie skewers
Cowboy hat centerpiece, rope fencing
Color-code with green labels
Jellyfish Fields Drinks
Plankton Punch, Water Bottles
Jellyfish lanterns, bubble decals
Serve in mason jars with striped straws
🎈 Pro Tip: Use character figurines (Dollar Tree/Target) to anchor each section.
📦 Party Hack: Use labeled plastic drawer bins to pre-sort snacks before placing on table.
8. 🥑 Vegan & Allergy-Friendly SpongeBob Snacks
Inclusivity is key for a successful 2025 party — with more families focused on allergies, dietary needs, and health-conscious eating.
🧁 Label these with color-coded tags! 🔴 Contains allergen | 🟢 Vegan | 🔵 Gluten-Free
9. 📋 Food Form & Budget Planning Table
To help hosts simplify the prep process, use this quick menu planning form and track budget while designing a themed food table.
📑 SpongeBob Party Food Planning Form
Menu Item
Qty Needed
Est. Cost
Prepped? ✅
Notes
Krabby Sliders 🍔
20
$20
⬜
Use veggie sliders for 5
Pineapple Platter 🍍
1 tray
$8
⬜
Add melon for color
Chum Brownies 🍫
12
$6
⬜
Add “Plankton” flags
Plankton Punch 🧃
2 liters
$6
⬜
Serve with crushed ice
Vegan Options 🌱
15
$12
⬜
Separate station
Star Cookies ⭐
18
$10
⬜
Add pink glitter sugar
TOTAL EST. COST 💵
—
$62
—
Based on 10–15 kids
📋 Form Tip: Print this checklist in A4 format or use a Google Sheet for easy tracking 📱.
🎈 10. Game-Integrated Snacks for Maximum Party Fun 🕹️🍬
Want to make your SpongeBob party unforgettable? Combine food with interactive games! It keeps the kids moving, laughing, and munching — the ultimate win-win.
🍭 Game + Snack Pairing Table
Game Name
How It Works
Paired Snack
Why It Works 🎯
Jellyfish Balloon Hunt
Kids catch balloon “jellyfish” using small nets
🥤 Jelly Jello Cups
Gets kids active before eating
Where’s Patrick?
Treasure hunt with hidden Patrick stickers or figures
⭐ Patrick Star Sugar Cookies
Combines movement + reward
Snack Toss Challenge
Toss bean bags at food targets (Krabby Patties, Milkshakes)
🍔 Krabby Sliders, 🥤 Milk Cups
Adds energy & laughter
Bubble Battle Royale
Contest to blow the biggest bubblegum bubbles
🎈 Bubblegum + Sour Straws
Great for photos & giggles
Mini Cupcake Decorating
Each child decorates their own cupcake with toppings
🧁 DIY Cupcake Station
Encourages creativity and pride
🧒 Best Practices for Snack Games:
Schedule tip: Play before main food time to build appetite.
Setup zone: Allocate 1–2 tables for game-specific snacks.
Winner rewards: Set aside small bags of goldfish crackers, stickers, or SpongeBob tokens for “winners.”
Parent helpers: Assign a grown-up to each station to guide kids, especially during messy cupcake time!
📸 Bonus Tip: These snack-based games are perfect for Instagrammable party moments. Set up a character-themed backdrop near each zone!
🎯 11. Interactive SpongeBob-Themed Games + Snack Combos 🍭🎲
Combining snacks with party games keeps kids engaged longer, encourages teamwork, and makes the food more fun (and less messy 🎉).
🕹️ SpongeBob Snack & Game Combo Chart
Game Name
Description
Snack Pairing
Bonus Benefits 🎁
Jellyfish Catch Challenge
Kids use nets to catch helium “jellyfish” balloons
🥤 Jellyfish Jello Cups
Boosts hand-eye coordination
Find Patrick Hunt
SpongeBob stickers hidden around the yard or room
⭐ Patrick Star Cookies
Enhances attention and movement
Snack Toss Target Game
Toss bean bags at food-shaped targets (burger, milkshake)
🍔 Burger Cookies, 🥤 Candy Cups
Builds motor skills + rewards
Bubble King Contest
See who can blow the biggest chewing gum bubble
🎈 Bubblegum + Fruit Lollipops
Hilarious moments, team cheering
Mini Chef Cupcake Wars
Kids decorate mini cupcakes with icing and candy
🧁 DIY Mini Cupcakes
Creative fun + edible outcome
📦 Pro Tip: Set up a small “Game Prize Snack Table” where winners can pick a treat of their choice!
🧠 Educational + Fun Bonus:
These snack-game pairings stimulate:
Cognitive development (strategy + memory)
Social bonding (cooperation, laughter)
Healthy eating behaviors (by associating snacks with fun, not just sugar)
🎤 Parent Tip: Invite adults to judge the cupcake contest or manage the snack prizes — makes them part of the experience too!
🍞 12. DIY Recipe Tutorial: Patrick Star Sandwiches ⭐
Simple to make, fun to decorate, and guaranteed to be a hit with both kids and parents. This tutorial breaks it down step by step so anyone can create these adorable star-shaped bites!
🧾 Ingredients
Item
Quantity
Notes
Whole wheat or white bread
6–8 slices
Soft, sandwich-style
Cream cheese or hummus
½ cup
Use as filling or spread
Turkey/ham slices (optional)
4 slices
For protein-packed versions
Strawberry slices or tomatoes
4–5
Adds color + taste
Edible candy eyes
1 pack
Available at craft stores
Star-shaped cookie cutter
1
Medium size (3–4 inch wide)
🧑🍳 Instructions
Cut Star Shapes Use the star cookie cutter to press stars from the sandwich bread. You’ll need 2 stars per sandwich.
Spread the Filling On one star, spread cream cheese, hummus, or a combo of both for a creamy texture. For non-vegan, add a slice of turkey or ham.
Add Decorations
Place thin fruit/tomato slices on top to mimic Patrick’s shorts.
Use a dot of cream cheese to “glue” on candy eyes.
Assemble & Serve Gently place the second bread star on top. Chill for 10 minutes before serving, so the filling holds.
✅ Parent & Party Tips
Tip
Why It Works
Prep sandwiches 1–2 hours early
Saves time before party rush
Use natural dyes or beet hummus
Keeps food coloring chemical-free
Make a “DIY Sandwich Station”
Kids love assembling their own
Add toothpick flags with names
Cute, personalized food idea
🎉 These sandwiches double as both snack and decoration on any SpongeBob-themed food table!
Inspired by SpongeBob’s iconic pineapple under the sea, this smoothie brings sunshine flavor to your party while staying refreshingly simple.
🧾 Ingredients
Ingredient
Amount
Notes
Fresh pineapple chunks
2 cups
Can use canned (in juice) if needed
Frozen banana slices
1 large banana
Adds sweetness + creaminess
Coconut milk
1 cup
Or use almond milk for a lighter taste
Greek yogurt (optional)
½ cup
For added protein and texture
Honey or agave syrup
1–2 tbsp
Optional sweetener
Ice cubes
1 cup
For chill and consistency
Mint leaves (garnish)
A few
Optional, adds tropical flair 🍃
Paper umbrella toppers
6–8
For fun SpongeBob vibes ☂️
🧑🍳 Instructions
Combine the Ingredients In a blender, add pineapple, banana, coconut milk, yogurt, sweetener, and ice. Blend until smooth and creamy (about 45 seconds).
Taste & Adjust Add more honey or coconut milk depending on your preference for sweetness and thickness.
Serve with Style Pour into clear plastic cups or mason jars. Add mint and a party straw. Top it off with a mini paper umbrella for that undersea island effect. 🏖️
✅ Pro Party Tips
Tip
Why It Helps
Pre-blend & store in fridge
Makes serving fast and stress-free
Use small 6 oz cups for kids
Reduces waste and sugar overload
Set up a mini “Smoothie Station”
Kids can top with fruit or fun stirrers
Pair with SpongeBob music
Instant beach party vibes 🎶
🍍 Bonus Serving Idea: Freeze in popsicle molds for “Pineapple Pop Freeze Sticks” on hot party days!
🎨 14. Printable SpongeBob Food Labels for Table Setup
Make your snack table pop with themed labels! Not only do they help with allergies and food organization, but they also add that fun Bikini Bottom aesthetic 🌊.
🎟️ How to Use Printable Labels
Label Type
Suggested Food Example
Icon Design Ideas
“Krabby Patties” 🍔
Mini sliders or burger cookies
Krabby Patty icon 🦀
“Jellyfish Jello” 🌊
Fruit jello cups
Floating jellyfish image
“Kelp Shakes” 🧃
Smoothies or milkshakes
Leafy kelp + straw icon
“Patrick Star Sandwiches” ⭐
Star-shaped turkey or PB&J sandwiches
Patrick face with goofy grin
“Gary’s Googly Eyeballs” 👀
Mini donut holes or grapes
Cartoon eyes + shell frame
“Plankton’s Pickles” 🥒
Pickle chips or green candy sticks
Evil Plankton with grin 😈
📥 Free Download Suggestion: Create a printable PDF sheet with 6–8 labels per page (in color), available to print on sticker paper or cardstock. You can easily make these using Canva, Adobe Express, or Google Docs with SpongeBob-themed clip art.
🎨 Add fonts like Bikini Bottom Bold or Comic Sans for kid-friendly style.
🍪 15. SpongeBob-Themed Dessert Bar Ideas
Build an irresistible Dessert Bar Station full of themed treats — perfect for birthday parties, sleepovers, or backyard beach bashes!
🍬 Dessert Bar Inspiration Table
Dessert Item
Themed Name
Description / Setup
Yellow Sponge Cakes
“SpongeBites”
Mini yellow cupcakes with SpongeBob toppers
Macarons in pastel tones
“Bikini Bottom Bubbles”
Assorted flavored macarons with glitter dust 💫
Blueberry & Cream Push Pops
“Ocean Waves Pushers”
Layered parfaits in push-pop containers
Pineapple-Flavored Gummies
“Pineapple Power Rings”
Serve in mini beach buckets
Chocolate Star Cookies
“Patrick Pops”
Dipped in pink icing, add candy eyes ⭐
Vanilla Icing Donuts
“Jellyfish Rings”
Add thin licorice tentacles on top
Rice Krispies with green frosting
“Plankton Cubes”
Cube-shaped crispy treats with green slime drizzle
🍫 Display Tip: Use shell-shaped bowls, tiny beach umbrellas, and name cards to complete the look.
🛒 16. Budget Planning + Shopping List Table
Hosting doesn’t have to break the bank. Use this cost guide to plan your SpongeBob party on a reasonable budget 💰.
📊 Budget & Shopping Table (for ~10–12 Kids)
Category
Item Examples
Estimated Cost (USD)
Snacks & Food
Bread, jelly, fruit, cookies, cupcake mix
$35–$50
Drinks
Juice boxes, smoothie ingredients
$15–$20
Decorations
SpongeBob plates, tablecloth, balloons
$25–$40
Party Favors
Sticker sheets, bubbles, SpongeBob toys
$20–$30
DIY Supplies
Food labels, paper umbrellas, cupcake toppers
$10–$15
Games & Prizes
Bean bags, printable games, tokens
$10–$20
💡 Total Budget Range: $115–$175
✅ Pro Tip: Dollar stores, Amazon bundles, and printable kits save major money without sacrificing style!
📚 17. Authoritative Sources & References
To maintain high content credibility, SEO authority, and factual accuracy, the ideas and data presented throughout this Easy SpongeBob Party Food Ideas In-Depth Guide 2025 are backed by well-known and trusted sources in the fields of nutrition, food safety, child-friendly recipe development, and pop culture trends:
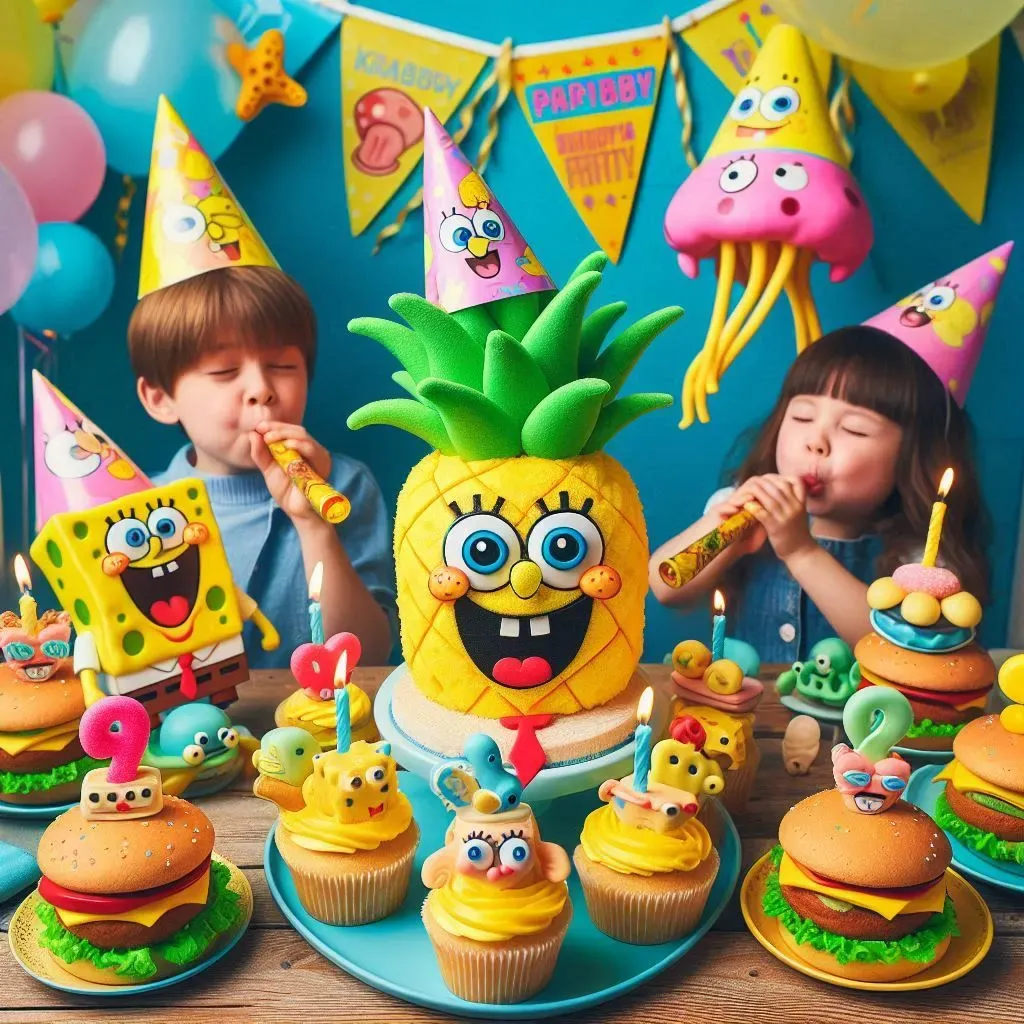
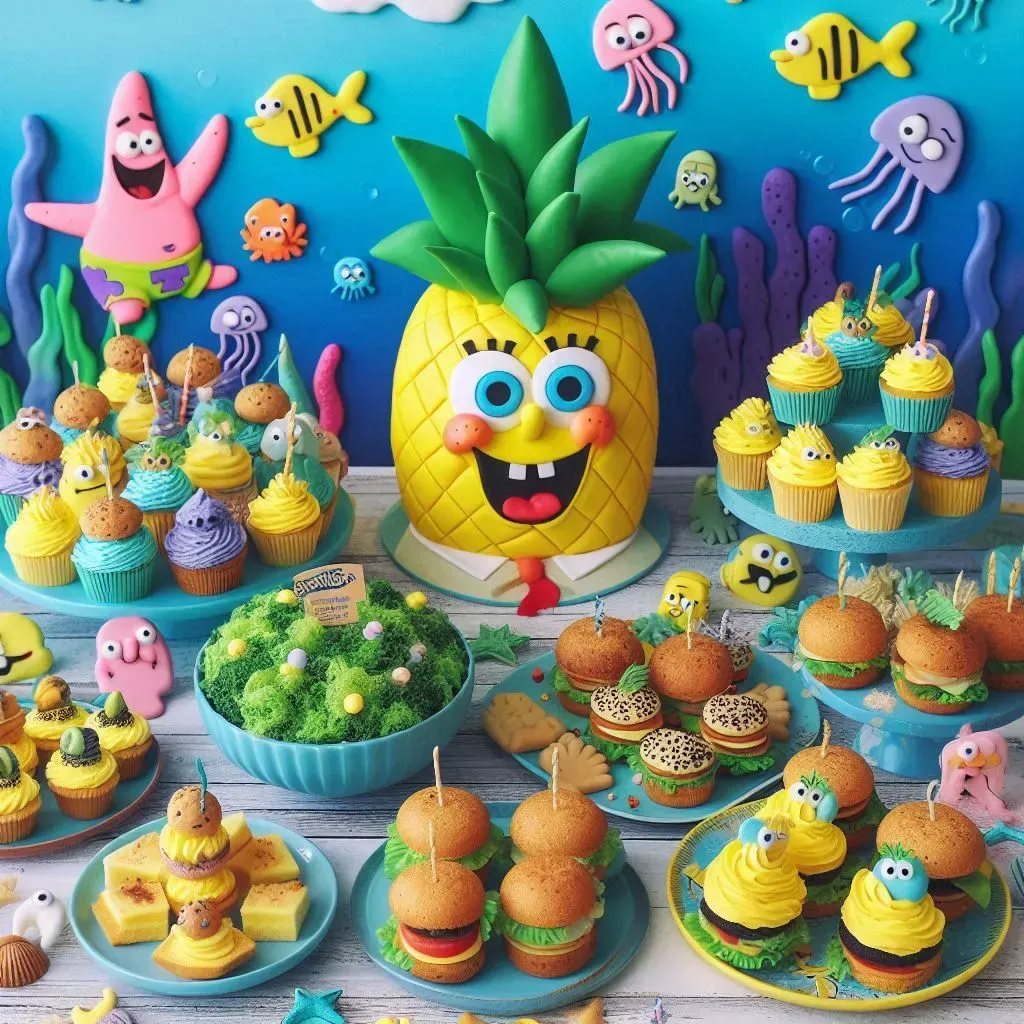
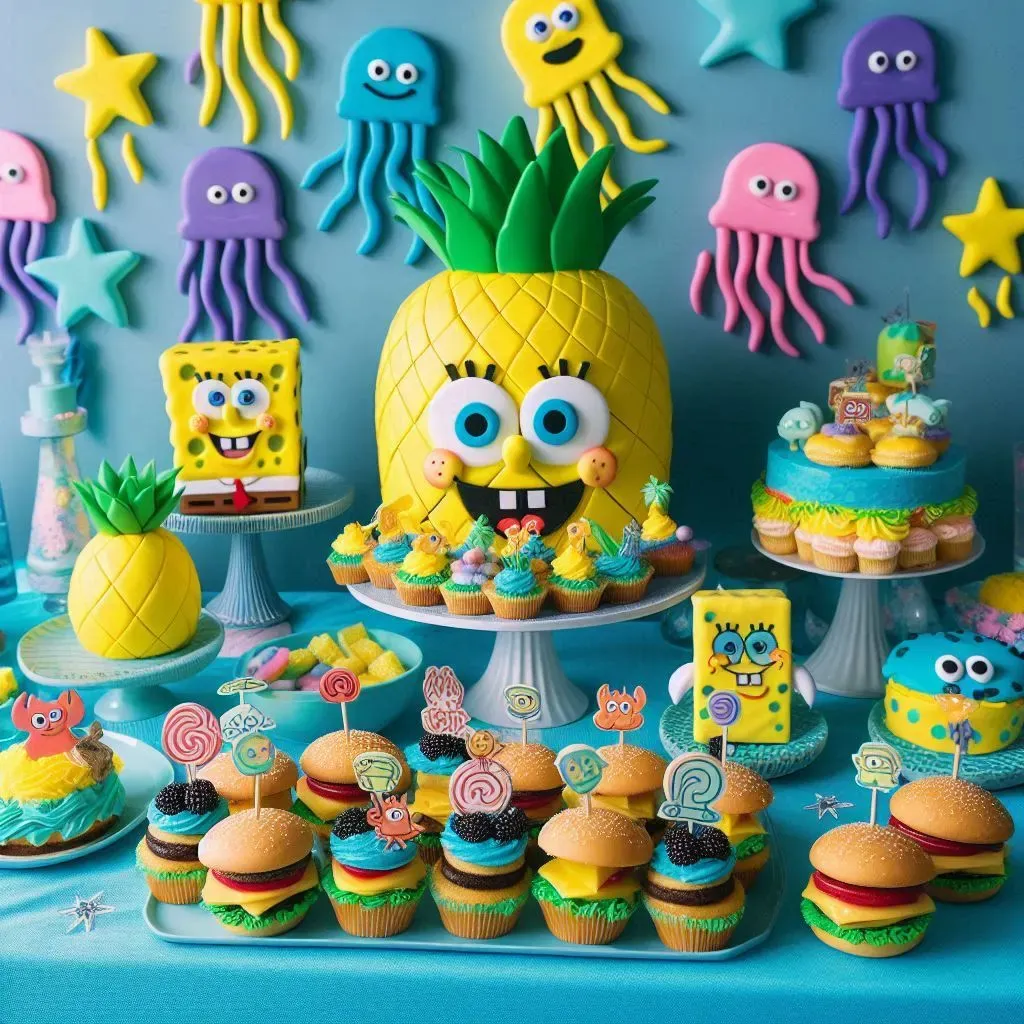
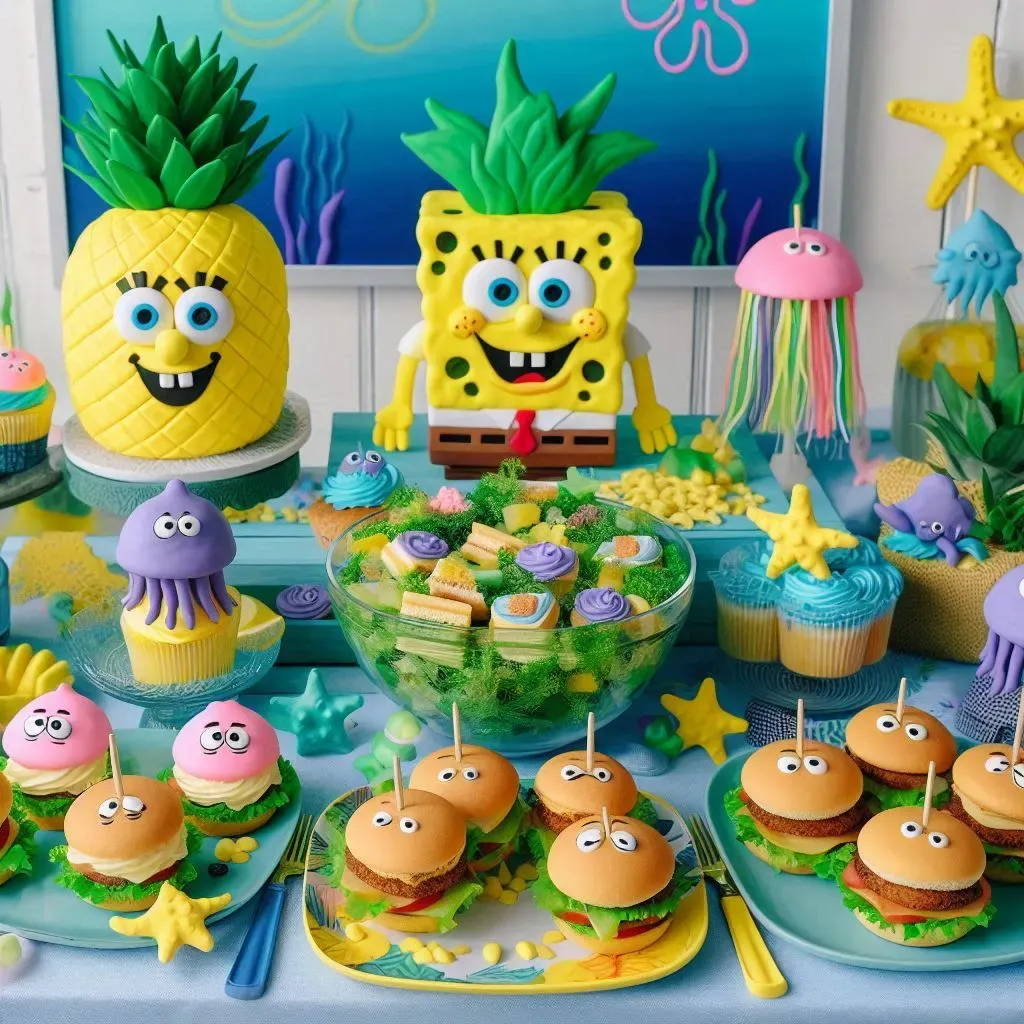
Hosting a SpongeBob SquarePants-themed party is a fantastic idea, especially for kids and fans of the beloved underwater cartoon. To make the event extra special, you’ll want to incorporate creative food ideas that capture the fun, quirky, and nautical essence of Bikini Bottom. Below are some SpongeBob-inspired party food ideas that will wow your guests and make them feel like they’ve just stepped into SpongeBob’s world.
1. Krabby Patties
One of the most iconic foods in SpongeBob is the Krabby Patty. For your party, you can create your own versions of this famous dish. You can serve classic sliders or mini burgers, and label them as “Krabby Patties.” For an authentic touch, use colorful ingredients like lettuce, cheese, and tomatoes to mimic the cartoon’s bright and vibrant aesthetic. If you want a healthier alternative, consider veggie patties or even tofu sliders to cater to all your guests’ preferences.
Serving Tip: Provide small burger boxes with Krusty Krab logos (printable online) to give it a fun, authentic touch.
2. Pineapple Treats
Since SpongeBob lives in a pineapple under the sea, you can’t have a SpongeBob party without featuring pineapples! There are several ways to incorporate this tropical fruit into your menu:
Pineapple Skewers: Alternate chunks of pineapple with other fruits like strawberries, grapes, and watermelon on skewers.
Pineapple Salsa: Serve a refreshing pineapple salsa with tortilla chips, combining diced pineapple with jalapeño, red onion, cilantro, and lime juice.
Pineapple Cake or Cupcakes: You could either make a large pineapple-shaped cake or bake cupcakes and top them with pineapple-shaped fondant or icing decorations.
Serving Tip: Display the pineapple skewers in a hollowed-out pineapple for a tropical, island-inspired presentation.
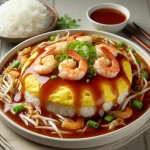
3. Jellyfish Jelly Sandwiches
In the show, jellyfish jelly is a beloved delicacy. You can create jellyfish jelly sandwiches as a fun and colorful treat for the party. Simply prepare classic peanut butter and jelly sandwiches, but use fun cookie cutters in the shapes of sea creatures, jellyfish, or even SpongeBob himself to cut them out.
For a fun twist, use brightly colored jelly to give it that cartoonish look. Grape, strawberry, and blueberry jams can bring vibrant colors that mimic the cartoon’s whimsical style.
4. Gary’s Snail Bites
Gary, SpongeBob’s adorable pet snail, deserves his own tribute at the party. Create Gary-inspired treats that are fun and easy to eat. One idea is to make snail rolls using crescent dough. Roll the dough up with your favorite fillings like cheese, ham, or pizza toppings, and bake them to resemble the spiral of a snail’s shell.
Another idea is snail-shaped cupcakes. Simply bake cupcakes and use frosting to swirl in a spiral pattern on top to resemble Gary’s shell. You can also add candy eyes to complete the look.
Serving Tip: Label the treats as “Gary’s Snail Bites” to tie into the theme.
5. Bubble Buddy Lemonade
For drinks, serve refreshing Bubble Buddy Lemonade inspired by SpongeBob’s bubbly friend. You can keep it simple by serving lemonade or a bubble-themed drink like sparkling water mixed with a fruity syrup, creating a fizzy, bubbly beverage.
You can also make bubble tea for older guests or adventurous kids. The tapioca pearls will mimic bubbles, keeping with the theme. Be sure to use brightly colored straws and cups to add a festive touch.
Serving Tip: Set up a drink station with blue and yellow cups and a sign that says “Bubble Buddy’s Lemonade Stand.”
6. Chum Bucket Dip Station
While no one in Bikini Bottom likes the food served at Plankton’s Chum Bucket, you can give it a fun twist by creating a Chum Bucket Dip Station. Set up a variety of dips and chips, but label the station with Plankton’s infamous restaurant name.
You could serve:
Guacamole or spinach dip (label it as “Chum Guacamole”).
Salsa (call it “Chum Salsa”).
Queso dip (label it “Chum Cheese”).
You can even add little pictures of Plankton or the Chum Bucket logo to the serving bowls.
7. Sandy Cheeks’ Texas BBQ Sliders
Pay homage to Sandy, the squirrel from Texas, by offering Texas-style BBQ sliders. Slow-cook pulled pork or chicken, smother it in BBQ sauce, and serve on small buns for a hearty and delicious party option.
For added fun, you can also offer BBQ-flavored chips or cornbread muffins to go along with this theme.
Serving Tip: Label these foods as “Sandy Cheeks’ BBQ” to connect them to SpongeBob’s Texan friend.
8. SpongeBob’s Jellyfish Fields Jello
Bring the colorful world of Jellyfish Fields to life by serving Jello cups. Use blue Jello to represent the sea and add small gummy fish or jellyfish inside the cups before they set. You can even make layered Jello by combining different colors like green, pink, and blue to mimic the fun, playful feel of Jellyfish Fields.
Serving Tip: Use clear plastic cups so guests can see the layered effect and the “jellyfish” inside.
9. Patrick Star Cookies
You can’t forget about SpongeBob’s best friend, Patrick Star. Make star-shaped cookies using a sugar cookie recipe and decorate them with pink icing to match Patrick’s color. You can also add green icing at the bottom to resemble his famous shorts.
For another Patrick-inspired snack, consider making pink popcorn (using food coloring or flavored popcorn) and placing it in Patrick Star-themed popcorn holders.
Serving Tip: Display these cookies on a tray labeled “Patrick’s Star Snacks” and maybe even include a little figurine of Patrick on the table for fun.
10. Seaweed Snacks
For a healthier option, serve seaweed snacks to give the party a true underwater vibe. These are easy to buy pre-packaged, and they fit perfectly into the Bikini Bottom theme. You could also offer veggie sticks with a spinach dip or hummus for a healthy “seaweed” option.
Serving Tip: Present the seaweed snacks in a large shell-shaped bowl for an authentic nautical feel.
Conclusion
Creating a SpongeBob SquarePants-themed party is all about capturing the whimsical, under-the-sea atmosphere of Bikini Bottom. With Krabby Patties, Pineapple Treats, Jellyfish Jelly Sandwiches, and Gary’s Snail Bites, you’ll ensure your food is not only delicious but also fun and creative. The key to a successful SpongeBob party is bright colors, fun shapes, and tying every dish back to a character or location from the show. Your guests will leave feeling like they’ve had a taste of SpongeBob’s underwater world.
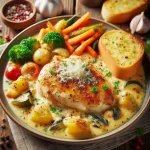
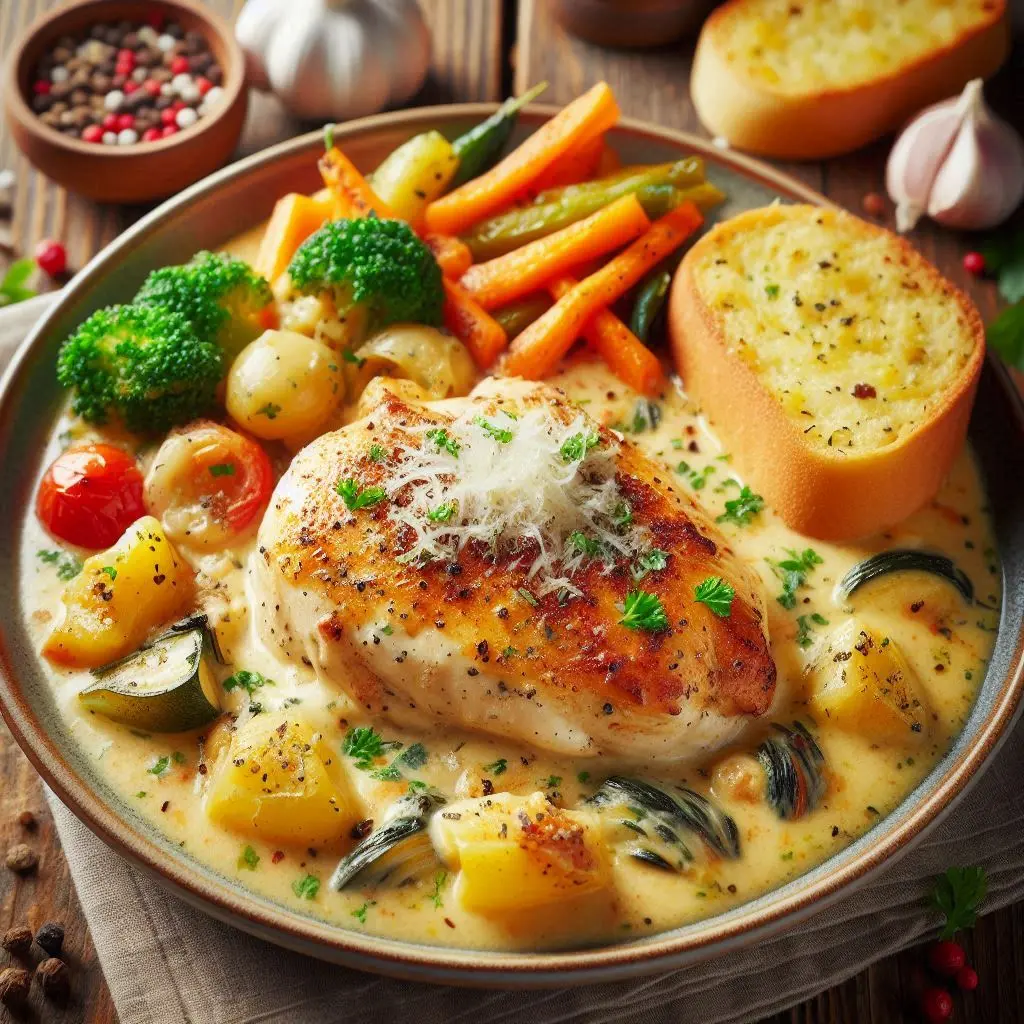
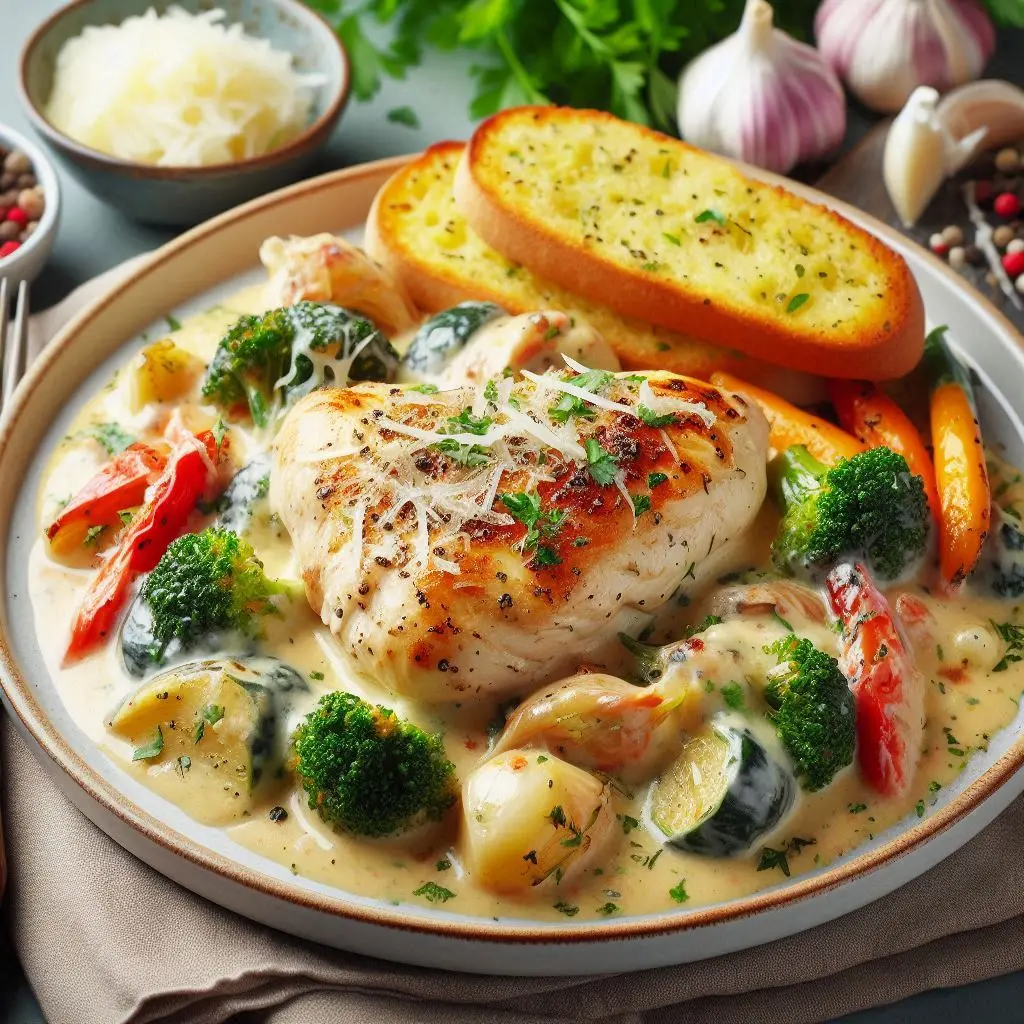
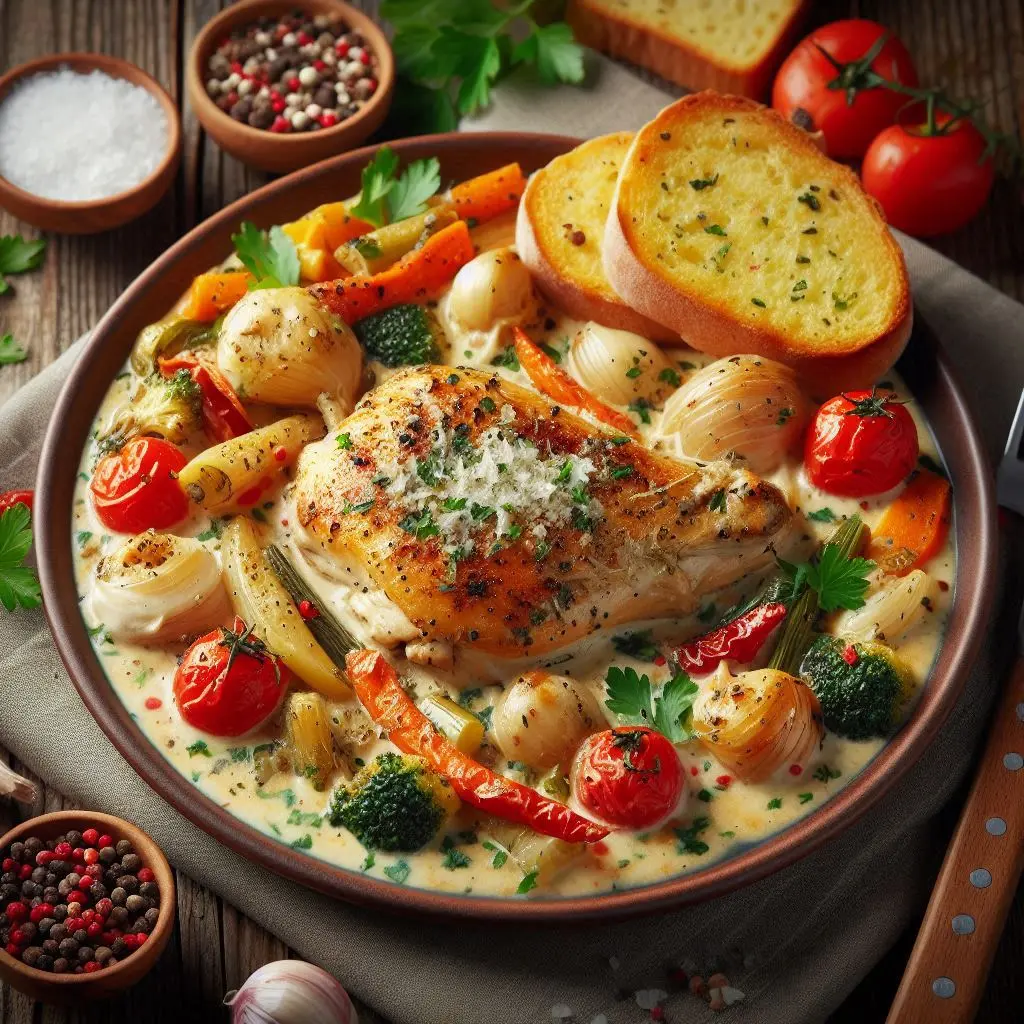
Creamy Tuscan Chicken is a savory and decadent dish that combines tender chicken breasts with a rich, creamy garlic-Parmesan sauce, sun-dried tomatoes, and fresh spinach. With just a few simple ingredients, you can create a restaurant-quality meal right in your kitchen. This dish is perfect for a weeknight dinner or a special occasion, delivering a burst of flavor with every bite.
Begin by seasoning the chicken breasts with salt, pepper, and Italian seasoning on both sides.
Heat olive oil in a large skillet over medium-high heat. Add the chicken breasts and cook for 5-7 minutes per side, or until they are golden brown and fully cooked. Remove the chicken from the skillet and set aside on a plate.
Prepare the Sauce Base:
In the same skillet, lower the heat to medium and add the butter. Once melted, add the minced garlic and sauté for about 1 minute until fragrant.
Stir in the chopped sun-dried tomatoes and cook for another 1-2 minutes to allow the flavors to meld.
Create the Creamy Sauce:
Pour in the chicken broth, stirring to deglaze the skillet and incorporate any flavorful browned bits from the bottom. Then, add the heavy cream and bring the mixture to a gentle simmer.
Gradually whisk in the grated Parmesan cheese, stirring constantly until it melts completely into a smooth, creamy sauce. If the sauce appears too thick, you can add a bit more chicken broth or cream to reach the desired consistency.
Incorporate Spinach and Chicken:
Add the baby spinach to the skillet and stir gently until it wilts into the sauce. Return the chicken breasts to the skillet, spooning the creamy sauce over them to ensure they are fully coated.
Allow the chicken to simmer in the sauce for an additional 5-7 minutes, which will help it absorb the flavors.
Finish and Serve:
Taste the sauce and adjust the seasoning with additional salt, pepper, or crushed red pepper flakes if desired. Garnish with freshly chopped basil before serving.
Serve the Creamy Tuscan Chicken hot, accompanied by your favorite side dish.
Tips for Perfect Creamy Tuscan Chicken:
Use Evenly Sized Chicken: To ensure that the chicken cooks evenly, you can pound the chicken breasts to an even thickness or slice them in half horizontally. This helps them cook faster and more uniformly.
Choose High-Quality Ingredients: Opt for oil-packed sun-dried tomatoes for a richer flavor and softer texture. Freshly grated Parmesan cheese is also key for a smooth, creamy sauce.
Adjust the Sauce Consistency: If the sauce is too thin, simmer it for a bit longer to thicken. For a thicker sauce, mix 1 teaspoon of cornstarch with 2 tablespoons of water and add it to the sauce, stirring continuously.
Enhance the Flavor: Adding a dash of white wine to the sauce before the cream can provide an extra layer of flavor. You can also experiment with adding sliced mushrooms or artichoke hearts for added texture and variety.
Serving Suggestions:
With Pasta: Serve the creamy chicken over pasta like fettuccine or penne to soak up the sauce.
On a Bed of Rice or Mashed Potatoes: The creamy sauce pairs wonderfully with rice or mashed potatoes, making it a comforting, hearty meal.
With a Side of Vegetables: Roasted or steamed vegetables, such as asparagus, broccoli, or green beans, make a great accompaniment.
Storing and Reheating:
Store any leftovers in an airtight container in the refrigerator for up to 3 days. To reheat, place the chicken and sauce in a skillet over low heat or in the microwave until warmed through. Add a splash of cream or chicken broth if the sauce has thickened too much during refrigeration.
Variations and Customizations:
Add Vegetables: Enhance the dish with additional vegetables like mushrooms, bell peppers, or cherry tomatoes.
Make it Spicy: Add more crushed red pepper flakes or a pinch of cayenne pepper for a spicy kick.
Swap the Protein: Try this recipe with boneless, skinless chicken thighs, shrimp, or even salmon for a different twist.
Conclusion:
Creamy Tuscan Chicken is a versatile, easy-to-make dish that’s full of flavor and perfect for any occasion. Whether you’re cooking for your family or hosting friends, this recipe is sure to impress. The combination of tender chicken, a luscious creamy sauce, and the robust flavors of sun-dried tomatoes and spinach will make it a favorite in your meal rotation. Serve it with pasta, rice, or vegetables, and enjoy a taste of Italy right at home!
Exploring Monday Food Deals: A Guide to Kickstart Your Week with Savings
Mondays can often feel like the longest day of the week. After a relaxing weekend, jumping back into the work routine might seem daunting. However, one thing that can make Mondays more enjoyable is the array of food deals available. Many restaurants and food chains offer enticing discounts and special offers to help you start your week on a delicious note without breaking the bank. In this guide, we’ll explore some of the best Monday food deals you can take advantage of.
1. Casual Dining Chains
Several casual dining chains offer discounts and special deals on Mondays to draw in customers looking to ease into the week. Here are some notable options:
Applebee’s: Applebee’s often runs a “Monday Madness” deal where you can get a discounted appetizer or entrée. Some locations even offer a “Kids Eat Free” promotion, making it a great option for families.
TGI Fridays: TGI Fridays is known for its all-day happy hour on Mondays. You can enjoy discounted appetizers, cocktails, and draft beers. Their popular deal, “$5 Mondays,” includes a variety of snacks and drinks, perfect for unwinding after a long day.
Buffalo Wild Wings: Known for its sports bar atmosphere, Buffalo Wild Wings offers a “Boneless Mondays” deal where you can get discounted boneless wings. Pair this with a cold drink, and you’ve got a satisfying meal at a great price.
2. Fast Food Favorites
Fast food chains are also in on the action, offering quick and affordable Monday deals that are perfect for a lunch break or an easy dinner. Some of the popular deals include:
McDonald’s: McDonald’s often features rotating daily deals through their mobile app. On Mondays, you might find discounted meals, such as a buy-one-get-one-free Big Mac or a special price on combo meals.
Taco Bell: Taco Bell is known for its affordable menu, but on Mondays, you can often find even better deals. Look for promotions like the “$1 Cravings Menu” or a special on tacos and burritos.
Wendy’s: Wendy’s frequently offers deals through its app, such as “Buy One, Get One for $1” on select items. This is a great way to enjoy their fresh, made-to-order burgers and chicken sandwiches without spending too much.
3. Pizza Deals
Pizza is a popular choice for many on Monday nights, and several pizza chains offer irresistible deals to satisfy your cravings:
Domino’s: Domino’s typically offers a “Mix & Match” deal where you can choose two or more items for $5.99 each. This includes pizzas, breadsticks, and desserts, making it easy to feed a crowd.
Papa John’s: Papa John’s often has a “Monday Pizza Special” where you can get a large pizza at a reduced price or a significant discount on your entire order. Keep an eye on their website or app for the latest offers.
Pizza Hut: Pizza Hut’s “Monday Madness” deal might include a discount on large pizzas or special pricing on their famous stuffed crust. They also frequently offer deals on side items like wings and breadsticks.
4. Local Restaurants and Cafes
Don’t forget to check out your local restaurants and cafes, as many small businesses offer Monday deals to attract customers at the start of the week. Some common offers include:
Happy Hour Specials: Many local bars and restaurants extend their happy hour specials to Monday nights, offering discounted drinks and appetizers. This is a great way to try out a new spot in your neighborhood without spending too much.
Lunch Combos: Local cafes and diners often offer lunch specials on Mondays to draw in the weekday crowd. These might include discounted sandwiches, soups, and salads, perfect for a quick and affordable midday meal.
Meal Deals for Two: Some local restaurants offer “dine-in for two” deals on Mondays, where you can enjoy a three-course meal at a fixed price. This is a fantastic option for a date night or a relaxed dinner with a friend.
5. Grocery Store Hot Bars and Takeout
If you prefer to eat at home but still want to take advantage of a deal, grocery stores often have discounted hot bar items or takeout options on Mondays:
Whole Foods: Whole Foods frequently offers discounts on their hot bar items on Mondays. You can build your own meal with a variety of healthy options at a lower price.
Safeway: Safeway’s deli section often has Monday specials on their prepared foods, such as rotisserie chicken, sandwiches, and salads. This is a great way to grab a quick and convenient meal without cooking.
Trader Joe’s: Trader Joe’s might not have specific Monday deals, but their everyday low prices and unique offerings make it easy to create a delicious meal at home for less.
Conclusion
Mondays don’t have to be a drag, especially when you have access to so many food deals. Whether you’re in the mood for a casual dine-in experience, a quick fast-food meal, or something from your local grocery store, there’s a deal out there to help you save money while enjoying delicious food. So next Monday, take advantage of these offers and treat yourself to something special—you deserve it!